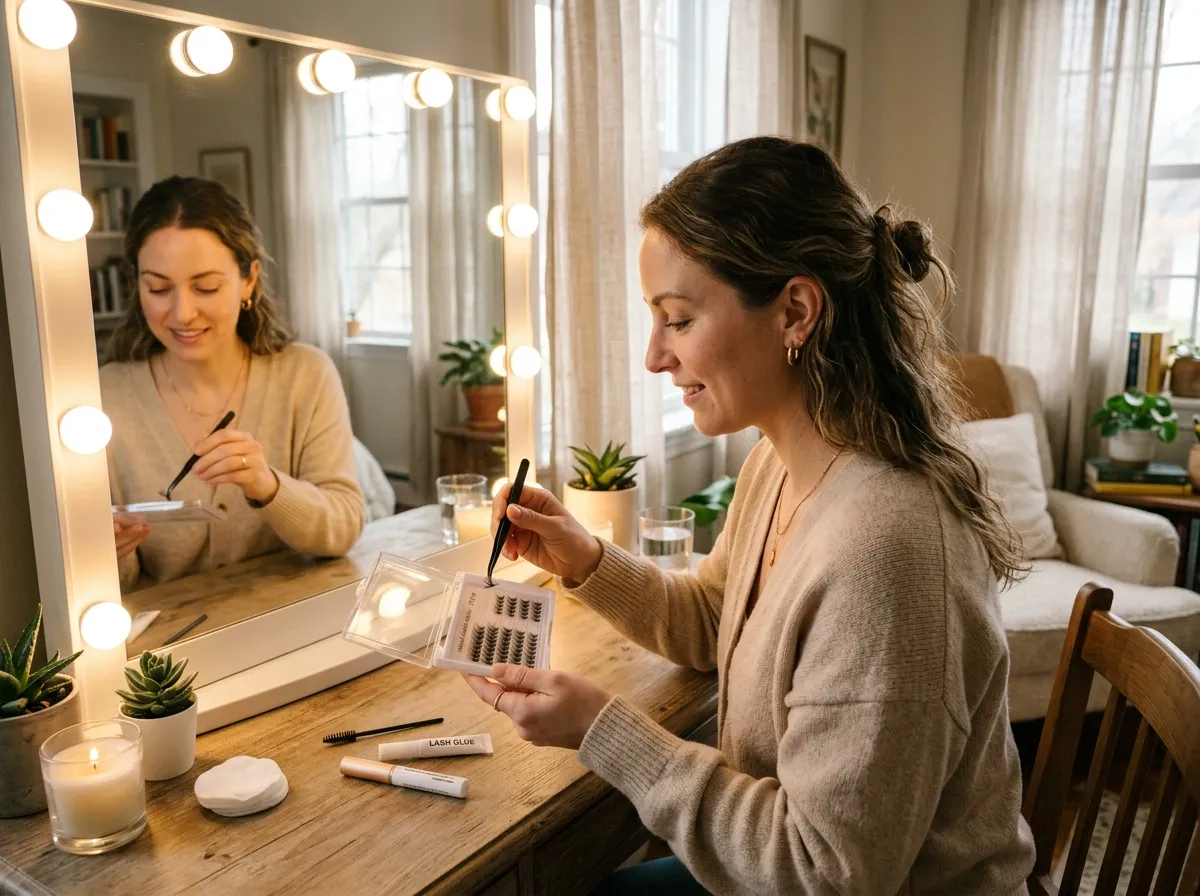
Salon lash extensions are incredible — but at anywhere from $100 to $250 per full set, they are not always the most budget-friendly option, especially when fills come around every two to three weeks. That is exactly why DIY lash clusters have taken over TikTok, YouTube, and beauty forums in 2025 and 2026. With the right kit, the right technique, and a little practice, you can achieve a genuinely gorgeous, multi-day lash look from the comfort of your own bathroom — no professional training required.
This guide walks you through everything you need to know about applying lash clusters at home using the bond-and-seal method — the technique that has made DIY lashes more accessible, longer-lasting, and safer than ever before.
What Are DIY Lash Clusters?
Lash clusters — sometimes called lash segments or individual cluster lashes — are small, pre-made groups of lash fibers that fan out from a single base. Unlike traditional strip lashes, which run the full length of the eye in one piece, clusters are applied in sections along your natural lash line. This means you can fully customize the placement, density, and style of your look by choosing how many clusters to apply and where to put them.
They are distinct from the professional lash extensions, as your lash artist applies one hair at a time. DIY clusters are designed for at-home use and are meant to be worn for several days before removal — not permanently bonded like salon extensions. Think of them as a middle ground between false strip lashes (one-day wear) and professional extensions (multi-week wear).
Bond-and-Seal vs. Traditional Lash Glue
If you have ever used a tube of drugstore lash glue, you already know the frustrations — tacky timing windows, irritating fumes, and that unmistakable white-gray residue. The bond-and-seal system is a completely different approach that has become the gold standard for at-home cluster application.
A lash bond is a flexible adhesive applied to the base of each cluster before placement. It creates a strong but pliable hold that moves naturally with your lash line. A lash seal is then applied over the entire lash line once all clusters are in place — it locks everything down, adds extra longevity, and creates a smooth, seamless finish that blends your clusters with your natural lashes. Used together, bond and seal can keep your clusters in place for three to seven days, depending on your aftercare.
What You Need Before You Start
Getting your supplies right before your first application makes the whole experience significantly smoother. Trying to improvise with the wrong tools is the number one reason DIY lash beginners get frustrated and give up after one attempt.
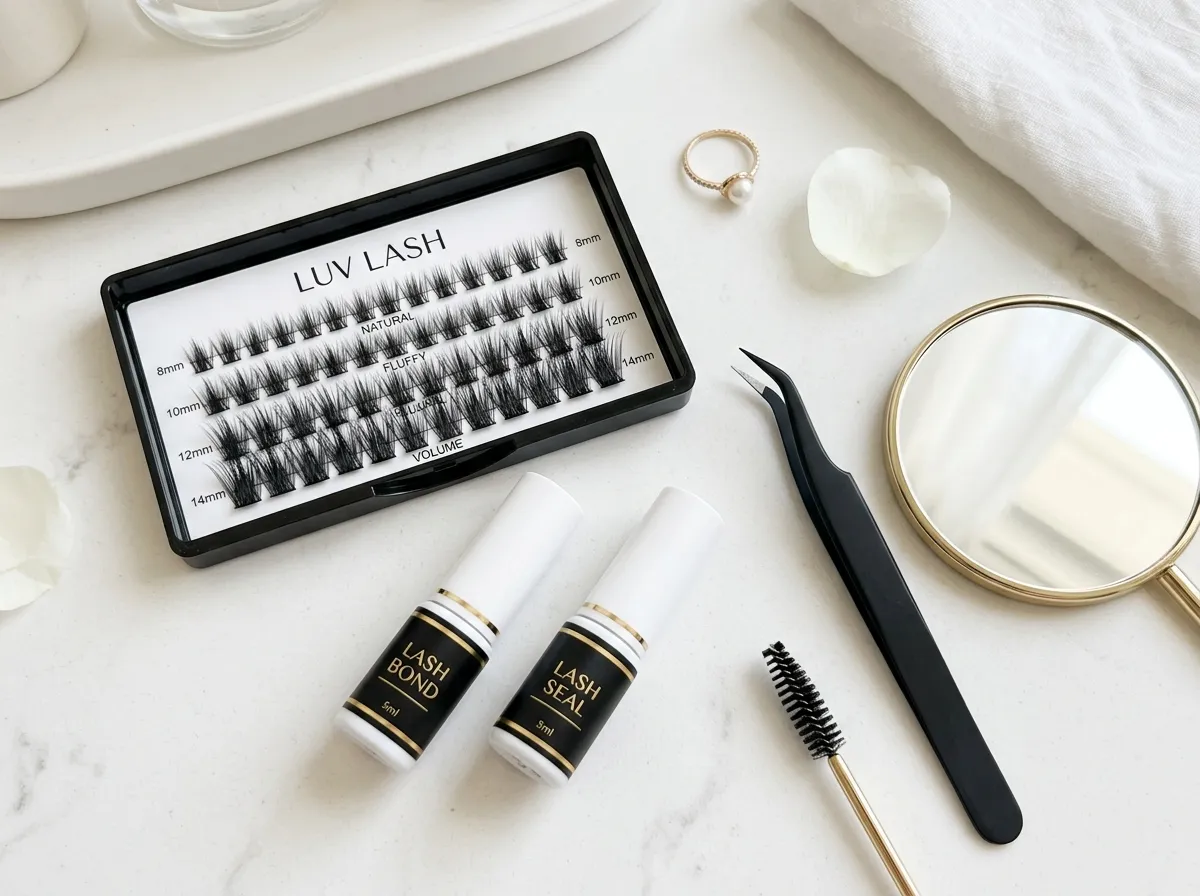
Essential Supplies
- Lash clusters — choose a multi-length kit so you can vary placement (shorter clusters toward the inner corner, longer toward the outer)
- Lash bond — look for a latex-free, waterproof formula
- Lash seal — often sold as a set with the bond from the same brand
- Precision tweezers — both straight-tip and curved applicator tweezers make placement easier
- Lash mirror — a magnifying mirror at eye level is a genuine game-changer
- Oil-free eye makeup remover — for clean-up and eventual removal
Prepping Your Natural Lashes
Preparation is the step most beginners skip, and it is the reason their clusters fall off by day two. Your natural lashes need to be completely clean, oil-free, and dry before any bond touches them. Any trace of mascara, eye cream, or facial oil will create a barrier between the bond and your lash, weakening the hold immediately.
Curl your natural lashes with a lash curler before starting — this helps the clusters blend more naturally. If you have been using a lash growth serum, apply it at night and ensure it has fully absorbed before your morning application session. Most serums leave a fine residue that can interfere with bond adhesion if not given enough time.
How to Apply DIY Lash Clusters Step by Step
Once your lashes are prepped and your supplies are laid out, you are ready to start. Read through all the steps once before beginning so you have a clear mental picture of the full process.
Step 1 — Plan Your Lash Map
Before you open the bond, decide how many clusters you want to use and where they will go. A typical full look uses between 8 and 14 clusters per eye, depending on the cluster size and how dense you want the result. A simple and flattering starting map is to use shorter clusters (8 to 10 mm) at the inner corner, medium clusters (10 to 12 mm) across the middle, and your longest clusters (12 to 14 mm) at the outer third of the eye.
For a cat-eye effect, stack two clusters at the outer corner slightly angled upward. For a doll-eye or open effect, concentrate your longest clusters directly above the pupil. Understanding lash mapping techniques for different eye shapes will help you choose a placement strategy that genuinely flatters your eyes rather than just following a generic template.
Step 2 — Apply the Bond
Using the wand applicator, apply a thin layer of lash bond to your natural lash line — working in small sections rather than the full eye at once. Then, using tweezers, pick up your first cluster by the base and dip it lightly into the bond, or apply a small dot of bond directly to the cluster base using the wand. Wait about 20 to 30 seconds for the bond to become slightly tacky before placing the cluster. This is called the “tacky window” and placing during it — rather than when the bond is still wet — dramatically improves hold.
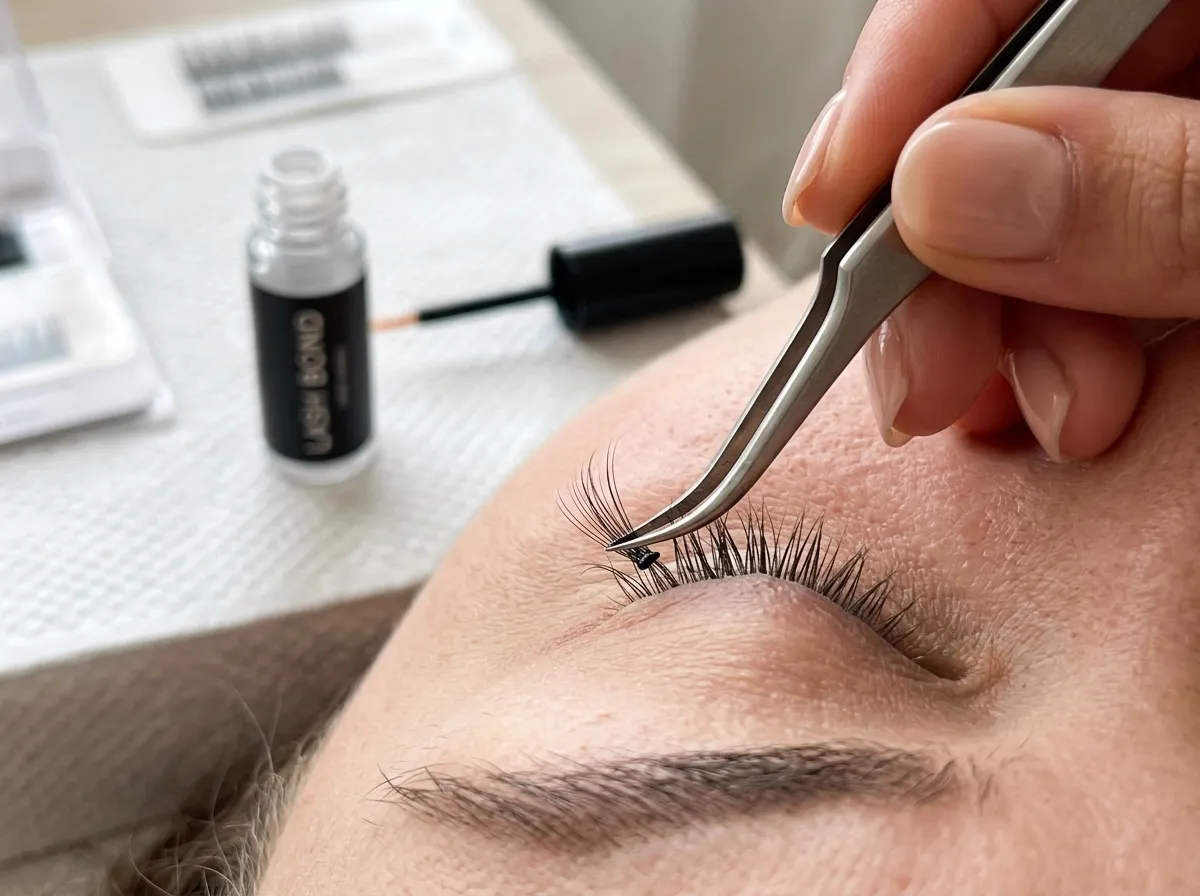
Step 3 — Place Each Cluster
Position the cluster underneath your natural lashes, pressing the base up against your natural lash line. You want the cluster base sitting on top of your natural lashes near the root, not directly on your skin or eyelid. This is the key distinction between salon-style placement (which bonds to individual lashes) and the DIY cluster method (which sandwiches between the lashes and the skin).
Use the flat side of your tweezers or a lash applicator tool to press the cluster gently into place and hold for five seconds. Work from the outer corner inward, completing one eye fully before moving to the other.
Step 4 — Apply the Seal
Once all clusters are placed on both eyes, allow the bond to set for two minutes before applying the seal. Using the seal wand, run a thin coat along the base of your lash line — covering the cluster bases and your natural lash roots in one smooth pass. The seal dries clear and flexible, locking everything in place and creating that polished, seamless finish. Allow the seal to dry fully for one to two minutes before touching your lashes.
Making Your Clusters Last Longer
The difference between clusters that last two days and clusters that last seven days almost always comes down to aftercare. The same principles that protect salon extensions apply here — with a few DIY-specific additions.
Aftercare Rules to Follow
- Avoid water, steam, and sweat for the first four hours after application to allow the bond to fully cure
- Sleep on a silk or satin pillowcase to reduce friction against the cluster bases
- Avoid oil-based skincare, cleansers, and makeup removers anywhere near the eye area — oils are the fastest way to dissolve lash bond
- Do not rub your eyes or tug at the clusters, even when they start to loosen at the end of their wear cycle
- Brush your clusters gently each morning with a clean spoolie to keep them aligned and tangle-free
If you want to extend wear even further, you can reapply the seal every two days as a top-up coat. Simply run a fresh layer along the lash line and allow it to dry — this refreshes the hold without needing to remove and reapply the clusters from scratch.
For more on protecting your natural lashes while wearing any extension or enhancement, the guide on avoiding and fixing lash damage covers the aftercare fundamentals that apply across all lash methods.
How to Remove DIY Lash Clusters Safely
Removal is where the most natural lash damage happens — not during wear, but when clusters are pulled off without proper technique. Never tug, peel, or force clusters off dry. This risks pulling your natural lashes out at the root.
The Safe Removal Process
Saturate a cotton pad with an oil-based eye makeup remover or micellar water and hold it against your closed lash line for 30 to 60 seconds. The oil breaks down the bond and seal, allowing the clusters to slide off with minimal resistance. You can also use a dedicated lash bond remover if the brand you purchased includes one in their kit — these are formulated specifically to dissolve the bond without irritating the eye area.
Once clusters are removed, cleanse your lash line thoroughly with a gentle foaming cleanser or lash-safe cleanser to remove all residue. Give your natural lashes a one to two-day rest before reapplying a fresh set — this breathing window is important for follicle health and helps prevent buildup at the lash root.
Common Mistakes to Avoid on Your First Try
Almost every beginner makes at least one of these mistakes on their first application. Knowing them in advance can save you a lot of frustration.
Using Too Many Clusters
More is not always better with DIY clusters. Overloading your lash line with too many or too-long clusters creates a heavy, artificial look and puts more strain on your natural lashes. Start with fewer clusters than you think you need — you can always add more, but removing and repositioning half-bonded clusters mid-application is messy.
Skipping the Tacky Window
Placing clusters onto wet bond is the single most common cause of early fallout. The bond needs that 20- to 30-second window to become adhesive enough to grip. Set a timer on your first few attempts, so you build the habit of waiting correctly.
Applying Clusters Directly to Skin
Cluster bases sitting on your eyelid skin rather than your natural lashes will not only fall off faster — they can also cause irritation or a mild contact reaction. Always ensure the cluster base is resting on your lash roots, not bare skin. This placement also looks significantly more natural, which is the whole point of the cluster method over a traditional strip lash.
Using the Wrong Products Together
Not all lash bonds and seals are cross-compatible. Mixing a bond from one brand with a seal from another can cause chemical reactions that either fail to hold or create an uncomfortable film on the lash line. Stick to a matched bond-and-seal system from the same brand, especially while you are learning. The FDA’s guidance on eye cosmetics is also worth a quick read to understand what safety standards apply to lash adhesive products sold in the US.
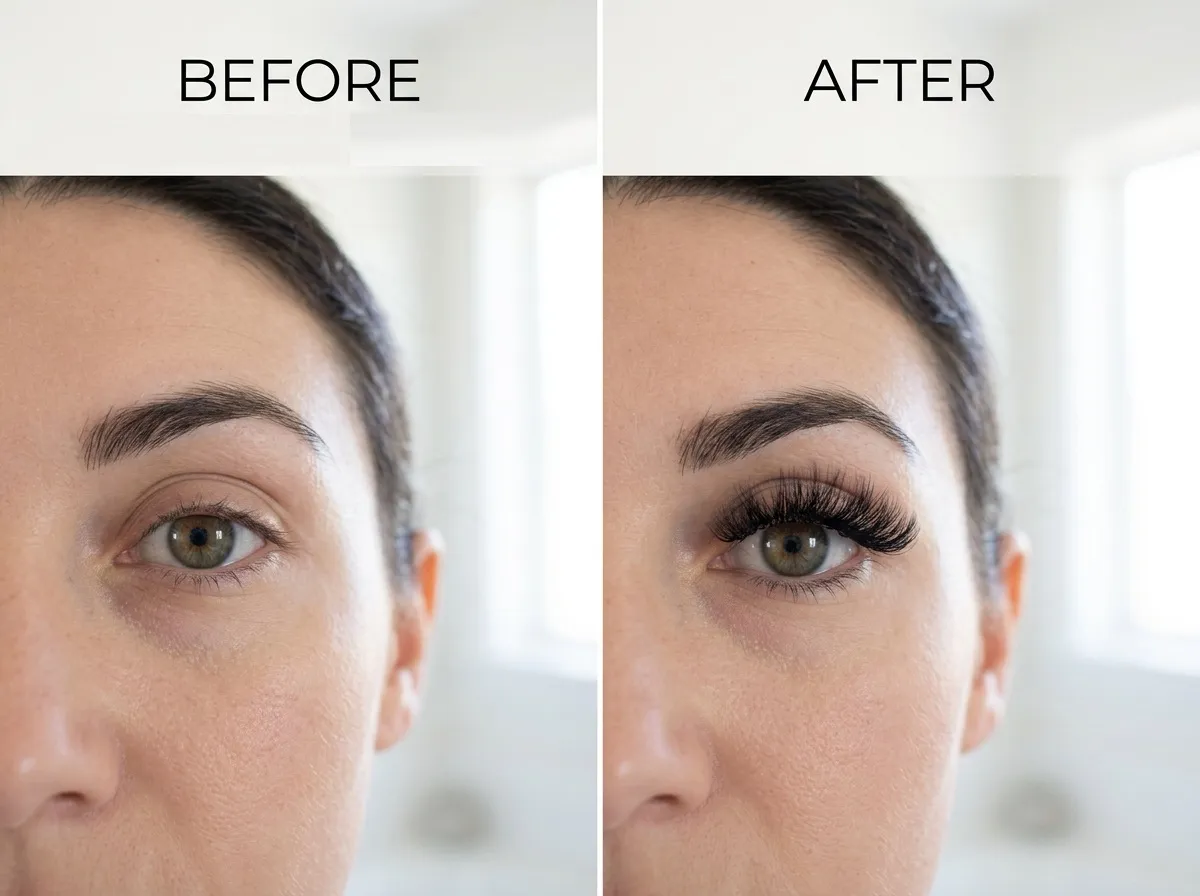
DIY Clusters Are Worth Learning
The learning curve on DIY lash clusters is real but genuinely short. Most people get a comfortable, confident result by their third application — and from there, it becomes a quick 15-to-20-minute routine that delivers results that can genuinely rival a salon visit at a fraction of the cost. Whether you are looking for an everyday enhancement, a festival-ready look, or just a way to keep your lashes full between professional appointments, the bond-and-seal method is one of the best skills you can add to your beauty toolkit in 2026.
If you want to explore how DIY clusters compare to other no-appointment lash options, the breakdown of lash extensions vs. magnetic lashes is a great next read — it puts the full spectrum of at-home and professional lash options in perspective so you can find the approach that fits your lifestyle best.