
The lash extension industry is experiencing a revolutionary shift in 2026, and at the heart of this transformation is bespoke lash mapping. Gone are the days when clients accepted generic, one-size-fits-all lash sets. Today’s clients expect — and deserve — personalized lash designs that complement their unique eye shape, lifestyle, and personal aesthetic. According to Fashion Week Daily’s 2026 industry report, customization has become the new standard, with clients no longer asking for standard sets but instead requesting lashes designed specifically for their individual features.
For lash artists, mastering bespoke lash mapping techniques is no longer optional — it is essential for staying competitive and delivering results that truly transform your clients’ appearance. This comprehensive guide will walk you through the art and science of custom lash mapping, helping you create stunning, personalized lash sets that keep clients coming back.
Why Bespoke Lash Mapping Matters in 2026
The shift toward bespoke lash mapping reflects broader changes in consumer expectations across the beauty industry. Clients are more educated than ever, thanks to social media platforms like TikTok and Instagram where they see countless lash transformations daily. They understand that their eye shape, natural lash condition, and personal style all play crucial roles in determining which lash design will look best on them.
Bespoke lash mapping addresses several critical needs. First, it ensures that lash extensions complement rather than overpower a client’s natural features. A mapping strategy that works beautifully for almond eyes might look completely wrong on hooded or downturned eyes. Second, customized mapping improves lash retention because the design accounts for the client’s natural lash growth patterns and lifestyle factors. Third, personalized designs create stronger client loyalty because clients feel seen, heard, and valued when their lash artist takes the time to create something uniquely suited to them.
Industry experts emphasize that lash artists who invest in developing strong mapping and consultation skills are thriving, while those relying on template approaches are struggling to retain clients. The KG Lash Supplies 2026 industry analysis confirms that offering bespoke customization is now expected rather than optional, with clients actively seeking artists who demonstrate expertise in personalized lash design.
Understanding Eye Shapes and Their Mapping Needs
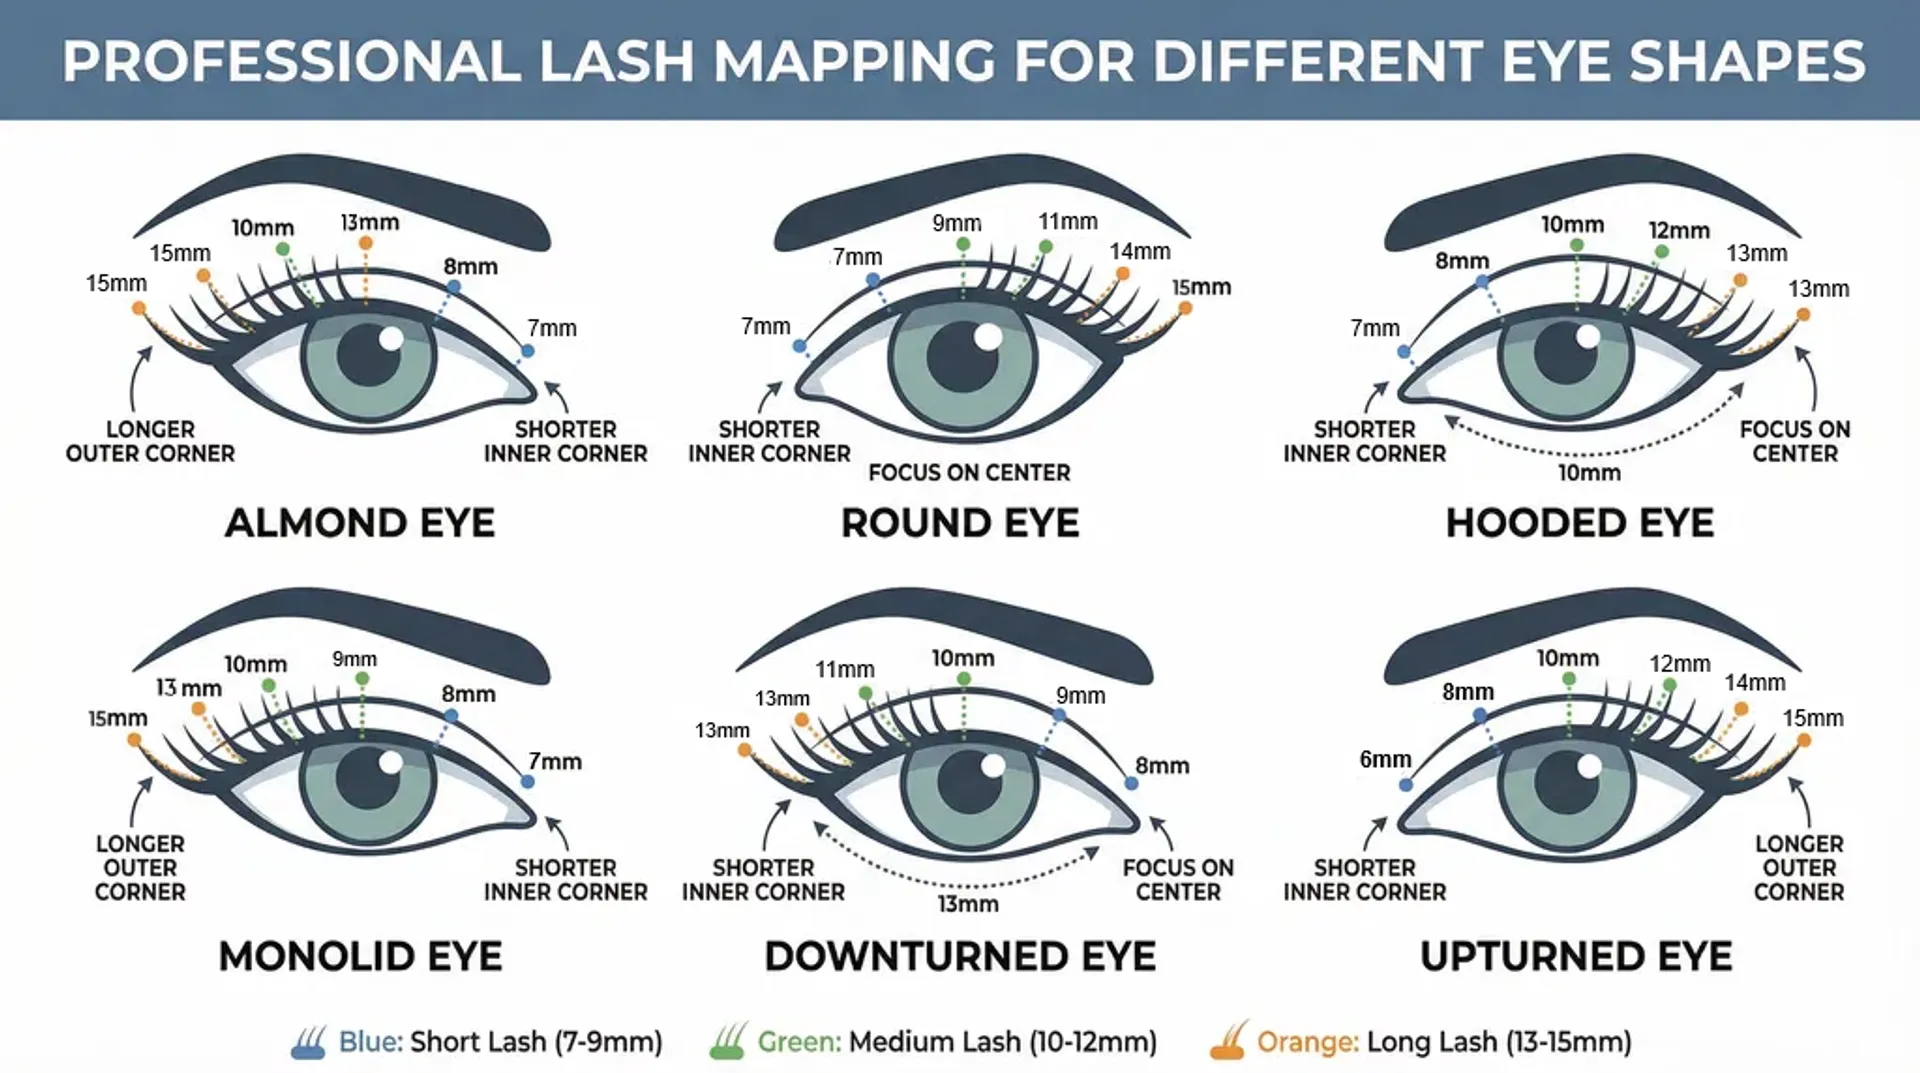
The foundation of bespoke lash mapping is accurately identifying your client’s eye shape. While there are six primary eye shapes — almond, round, hooded, monolid, downturned, and upturned — many clients have characteristics of multiple shapes or subtle variations that require careful assessment.
Almond Eyes
Almond eyes are considered the most versatile eye shape, characterized by a slightly upturned outer corner and visible crease. The iris is partially covered by the upper and lower lids, creating an oval or almond-like appearance. For almond eyes, you have the most flexibility in mapping choices. A classic approach places the longest lashes at the center of the eye to emphasize the natural shape, but you can also create cat-eye effects by extending length toward the outer corner or doll-eye looks by keeping length more uniform across the lash line.
Round Eyes
Round eyes have a more circular appearance with the iris fully visible and a pronounced crease. The goal when mapping round eyes is typically to create the illusion of elongation. Achieve this by placing shorter lashes at the inner and outer corners while concentrating medium to long lengths in the center. This creates a subtle almond effect that balances the roundness. Avoid overly long lashes in the center, as this can make round eyes appear even more circular.
Hooded Eyes
Hooded eyes feature a fold of skin that droops over the crease, making the eyelid appear smaller. This eye shape requires special mapping consideration because standard approaches can make the hood more prominent. Focus on creating lift by using longer lashes from the center extending toward the outer corner. Shorter lashes at the inner corner prevent the eye from appearing weighed down. The key is creating an upward and outward sweep that opens up the eye area.
Monolid Eyes
Monolid eyes lack a visible crease and have a flatter eyelid surface. Mapping for monolid eyes should emphasize dimension and definition. Use a gradual length progression from inner to outer corner, with the longest lashes positioned slightly past the center toward the outer edge. This creates the appearance of depth and lift. Avoid overly dramatic curls, which can appear unnatural on monolid eyes; instead, opt for moderate curls that enhance without overwhelming.
Downturned Eyes
Downturned eyes have outer corners that angle downward below the inner corners. The mapping goal is to create lift and balance. Place the longest lashes at the center of the eye, gradually decreasing length toward both corners. Focus particularly on the outer third, where you want to create an upward lift effect. Avoid extending length too far into the outer corner, as this can emphasize the downward angle rather than correct it.
Upturned Eyes
Upturned eyes feature outer corners that sit higher than the inner corners, creating a naturally lifted appearance. When mapping upturned eyes, you can either enhance the natural lift or create balance by softening it. For enhancement, place longer lashes toward the outer corners. For balance, keep length more uniform across the lash line with slightly shorter lashes at the outer corners to prevent an overly dramatic lift.
The Bespoke Mapping Process
Creating a truly bespoke lash map requires a systematic approach that combines technical skill with artistic vision. The process begins long before you pick up your tweezers and extends through every stage of the appointment.
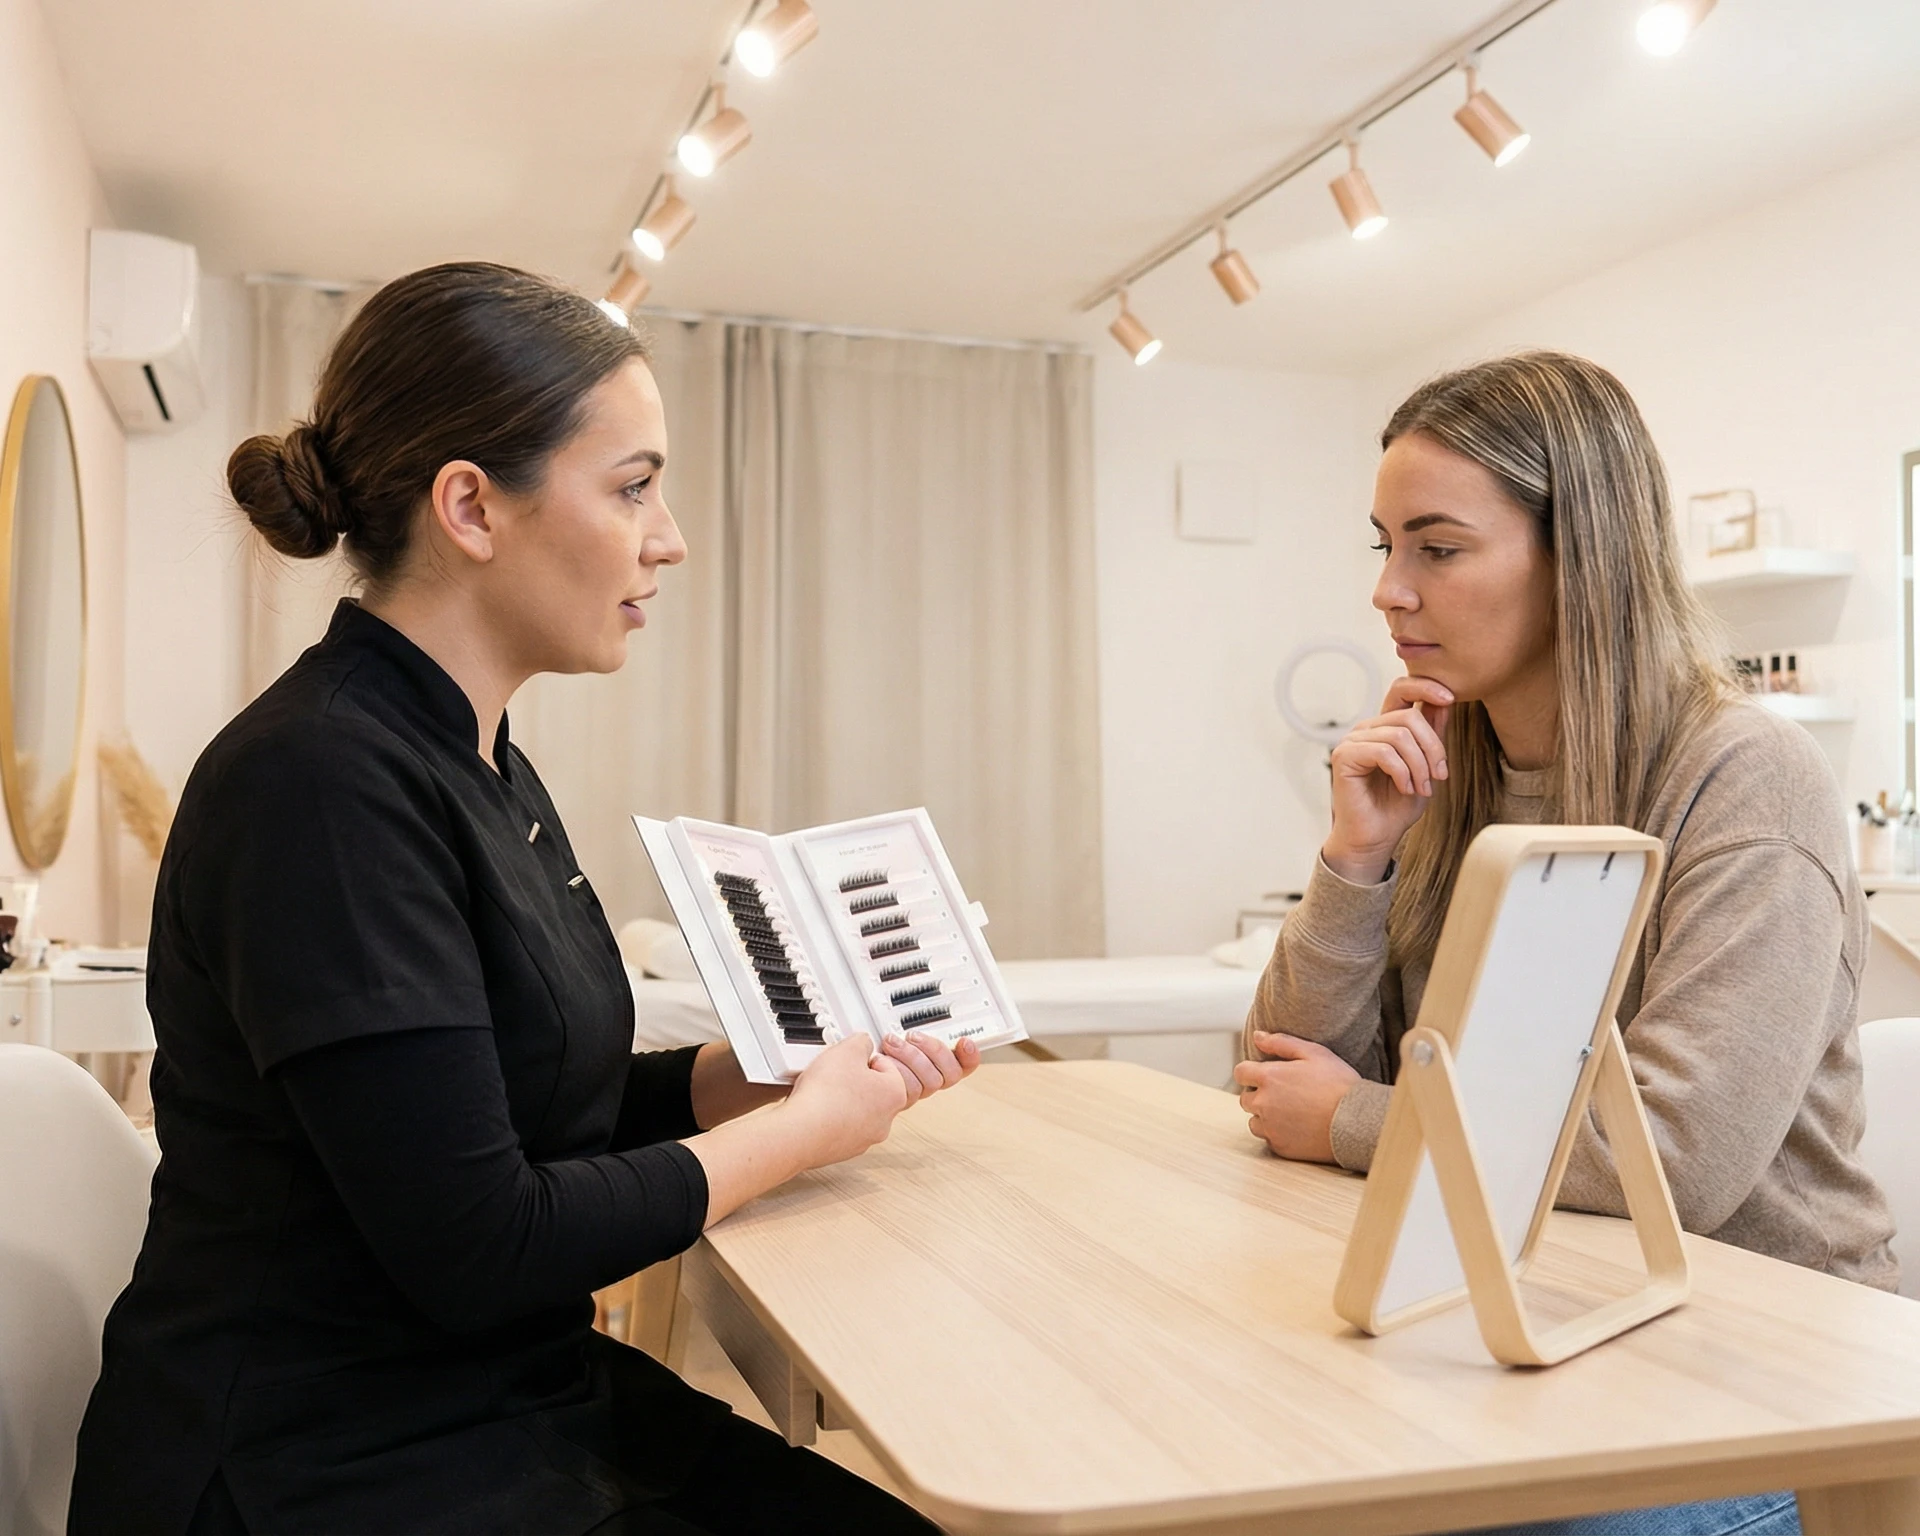
Initial Consultation and Assessment
Every bespoke lash mapping session should begin with a thorough consultation. Start by asking your client about their lifestyle, daily routine, and lash goals. Do they wear glasses? Do they sleep on their side? Are they looking for natural enhancement or dramatic impact? Do they have an upcoming event, or are they seeking an everyday look? These questions provide crucial context that informs your mapping decisions.
Next, assess the client’s natural lashes. Examine lash length, thickness, density, and growth direction. Note any gaps, sparse areas, or particularly strong lash zones. Check for any signs of damage or weakness that might affect which lash weights and lengths you can safely apply. This assessment helps you create a map that works with, rather than against, the client’s natural lash foundation.
Finally, analyze the client’s eye shape, facial proportions, and bone structure. Look at the eyes from multiple angles — straight on, from the side, and with the eyes closed. Consider how the client’s eyebrow shape, cheekbone structure, and overall facial balance will interact with different lash designs. This holistic assessment ensures your mapping creates harmony with the client’s entire face, not just their eyes in isolation.
Creating the Custom Map
With your assessment complete, you can begin creating the actual lash map. Many artists use mapping stickers or draw directly on the client’s eyelid with a skin-safe marker to mark key points. Divide the lash line into sections — typically inner corner, inner third, center, outer third, and outer corner — and assign specific lash lengths, curls, and thicknesses to each section.
Consider the transition between sections carefully. Abrupt changes in length create a choppy, unnatural appearance, while smooth gradations create seamless, professional results. Plan your curl selection to complement the client’s natural lash angle and desired effect. For example, clients with naturally straight lashes may need a more dramatic curl to achieve visible lift, while clients with naturally curled lashes might prefer a gentler curl to avoid an overly theatrical look.
Document your map thoroughly. Take photos, make notes, and record the specific products and techniques you plan to use. This documentation serves multiple purposes: it helps you stay organized during application, provides a reference for future appointments, and creates a record you can share with the client so they understand what to expect.
Communicating Your Vision
Before beginning application, walk your client through your mapping plan. Use a mirror to show them the marked sections and explain your reasoning. Describe how the length progression will enhance their eye shape, why you have chosen specific curls for different areas, and what the final result will look like. This communication builds trust, manages expectations, and gives the client an opportunity to provide input or request adjustments before you begin the time-intensive application process.
If you have access to virtual lash try-on technology, this is an excellent time to use it. Digital visualization tools allow clients to see different mapping options before committing, reducing miscommunication and increasing satisfaction with the final result.
Advanced Mapping Techniques by Eye Shape
While understanding basic eye shape mapping is essential, truly bespoke work requires mastering advanced techniques that address subtle variations and client-specific needs.
Asymmetrical Eye Correction
Many clients have subtle asymmetry between their eyes — one eye may be slightly larger, more hooded, or positioned differently than the other. Bespoke mapping allows you to correct these asymmetries by using different length progressions or curl selections for each eye. The goal is not to make the eyes identical but to create the illusion of balance and symmetry. This might mean placing the longest lashes slightly more toward the inner corner on one eye and more toward the outer corner on the other, or using a stronger curl on one eye to match the natural lift of the other.
Lifestyle-Specific Mapping
A client’s daily activities should significantly influence your mapping choices. Active clients who exercise frequently need lighter, shorter lashes that can withstand sweat and movement. Clients who wear glasses need mapping that accounts for lens proximity — overly long lashes in certain areas may brush against lenses, causing discomfort and premature lash loss. Clients who sleep on their side need special attention to the outer corners, which experience more friction and may require more conservative length choices to improve retention.
Age-Appropriate Mapping
As clients age, their skin texture, lash quality, and facial structure change. Mature clients often benefit from mapping that creates lift and openness without appearing overdone. Focus on moderate lengths with strategic placement to counteract any drooping or hooding that comes with age. Avoid overly dramatic volumes or lengths that can look heavy or unnatural on mature clients. Instead, emphasize quality over quantity, creating refined, elegant looks that enhance rather than overwhelm.
Seasonal and Occasion-Based Mapping
Consider creating different maps for the same client based on seasons or special occasions. A client might prefer a more natural, lightweight map for summer when heat and humidity affect retention, but request a more dramatic, voluminous map for winter holidays or special events. Documenting multiple mapping options for each client allows you to offer variety while maintaining consistency in quality and style.
Client Consultation and Communication
The technical aspects of bespoke lash mapping are only part of the equation. Equally important is your ability to communicate effectively with clients throughout the consultation and application process.
Start every consultation by listening more than you speak. Ask open-ended questions that encourage clients to share their vision, concerns, and preferences. Pay attention not just to what they say but how they say it — a client who hesitates when describing their desired look may need more guidance, while a client who brings reference photos and specific terminology likely has a clear vision you need to honor.
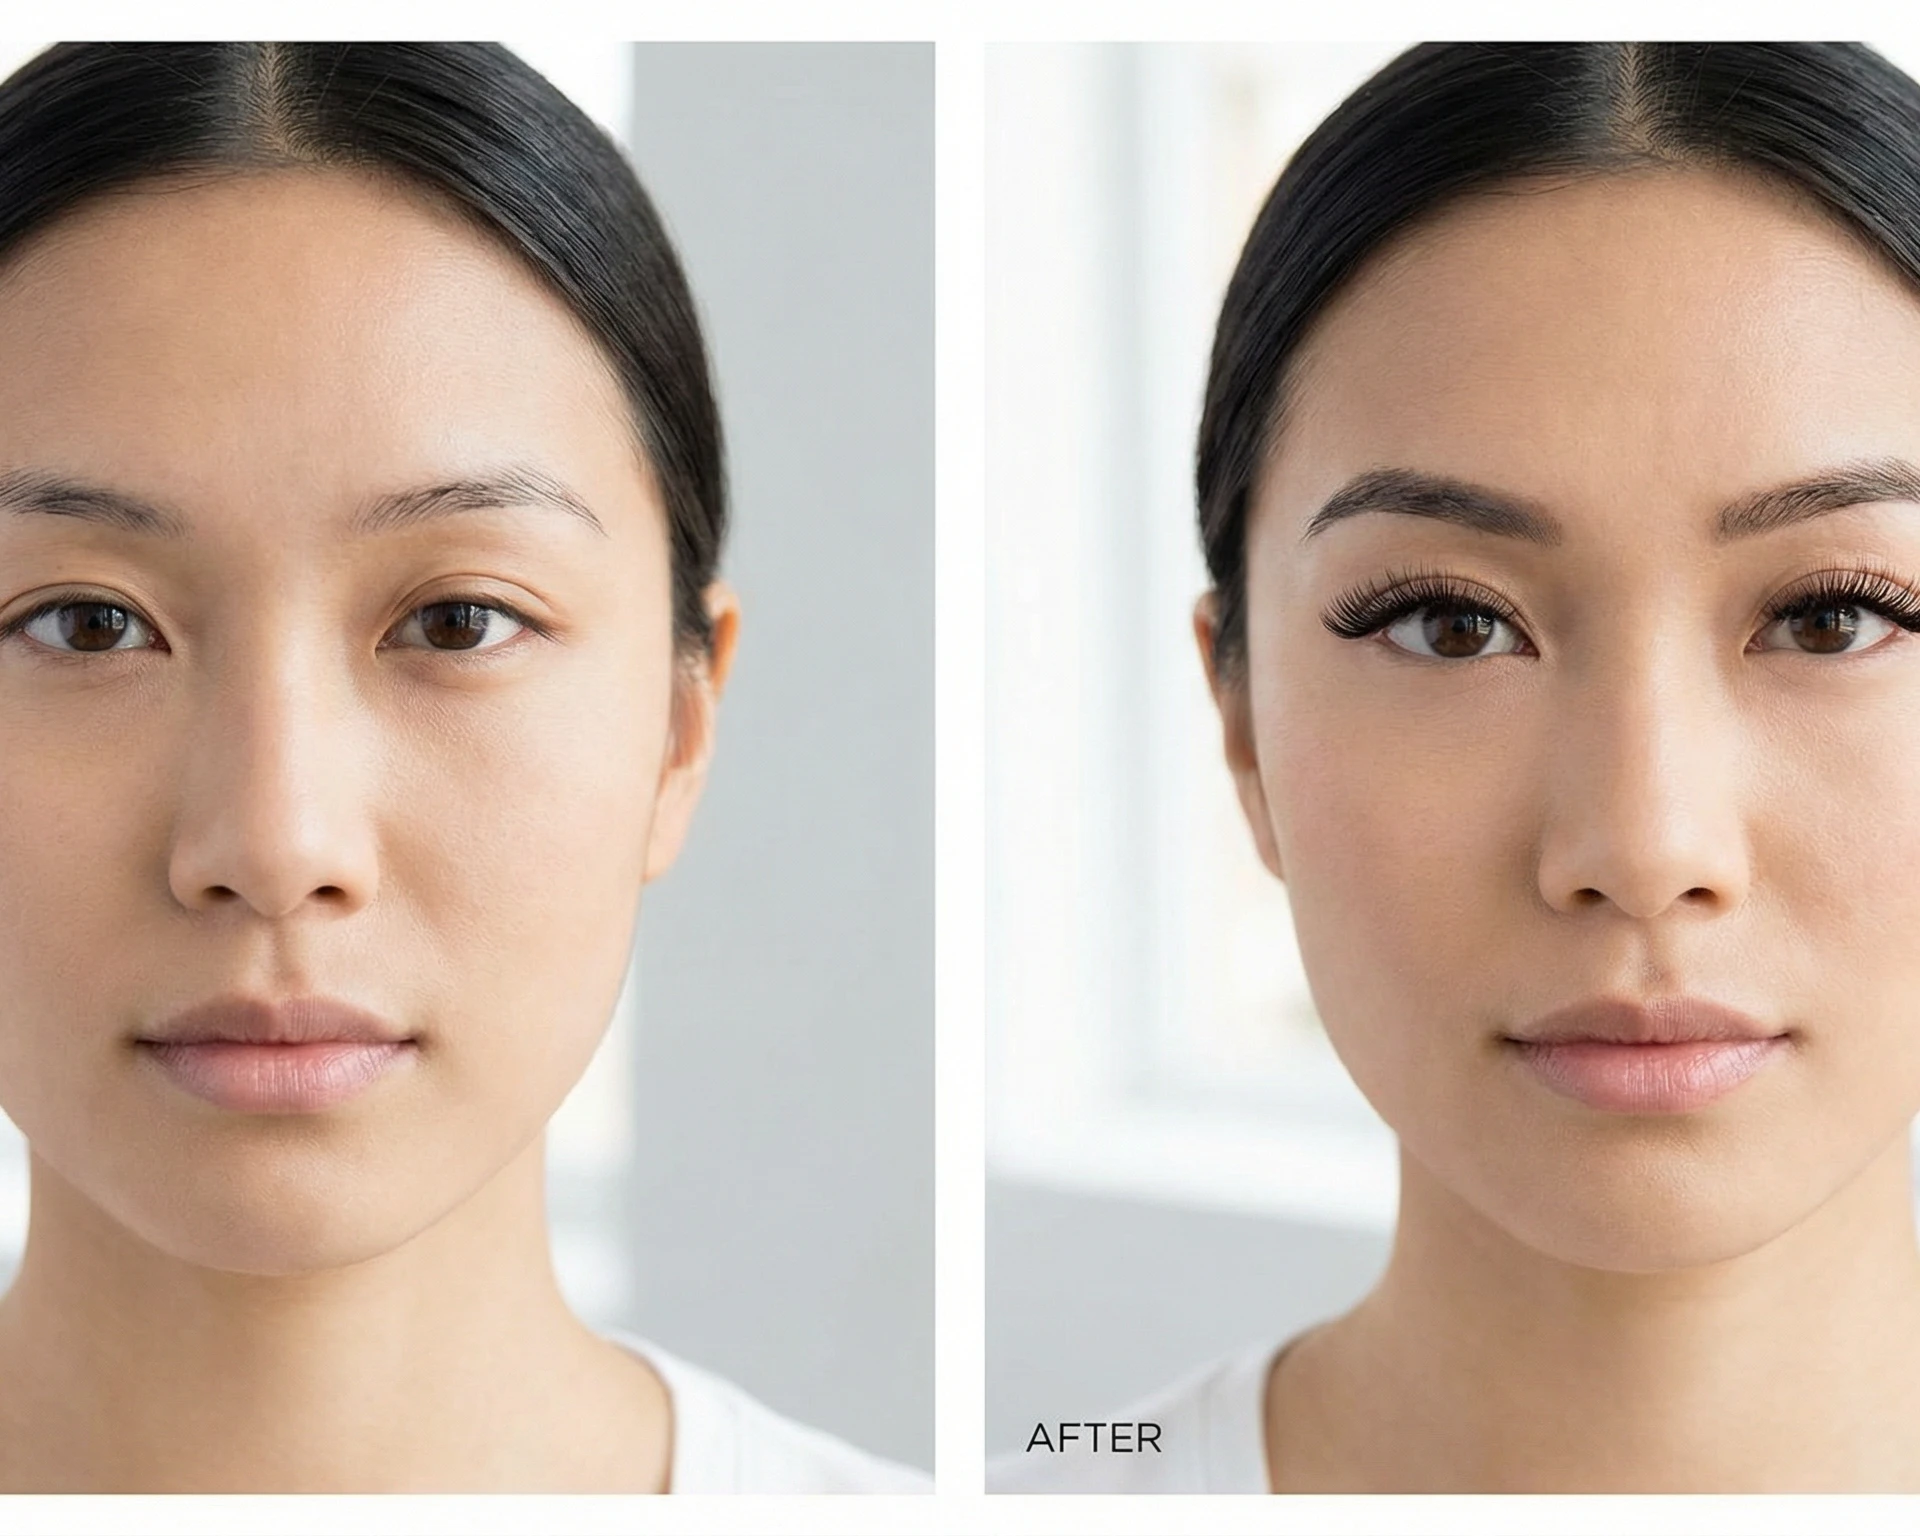
Use visual aids to bridge communication gaps. Show clients sample lashes in different lengths and curls. Display before-and-after photos of previous clients with similar eye shapes. If possible, use a tablet or phone to show them images that illustrate the mapping concepts you are explaining. Visual communication is particularly important for clients who are new to lash extensions and may not be familiar with industry terminology.
Set realistic expectations about what bespoke mapping can and cannot achieve. While customized mapping dramatically improves results, it cannot completely change a client’s eye shape or overcome significant natural lash limitations. Be honest about what is possible given the client’s natural lash foundation, and suggest alternatives if their initial vision is not achievable. This honesty builds trust and prevents disappointment.
After the appointment, provide clients with aftercare instructions specific to their custom map. If you have used longer lashes in certain areas, remind them to be extra gentle when cleansing those sections. If you have created a dramatic outer corner, advise them about sleeping positions that will protect those lashes. Personalized aftercare guidance demonstrates your commitment to their long-term satisfaction and helps ensure the longevity of your beautiful work.
For more guidance on building strong client relationships and retention, explore our article on marketing your lash business in 2025, which covers consultation techniques and client communication strategies.
Common Mapping Mistakes to Avoid
Even experienced lash artists can fall into mapping pitfalls that compromise results. Being aware of these common mistakes helps you avoid them and refine your technique.
One frequent error is following templates too rigidly. While mapping templates provide helpful starting points, treating them as inflexible rules prevents true customization. Every client is unique, and your mapping should reflect that individuality. Use templates as guides, not gospel, and be willing to deviate when a client’s specific features call for a different approach.
Another mistake is failing to account for natural lash growth patterns. If a client has lashes that naturally grow downward in certain areas, mapping longer lashes in those zones without considering the growth angle can create an unflattering result. Always work with the natural lash direction, using curl selection and strategic length placement to enhance rather than fight against natural growth patterns.
Overlooking facial proportions beyond the eyes themselves is another common pitfall. A mapping that looks perfect when you focus solely on the eyes might appear unbalanced when you consider the client’s eyebrows, cheekbones, and overall facial structure. Always step back and assess your mapping in the context of the entire face to ensure harmony and proportion.
Finally, many artists underestimate the importance of documentation. Failing to record your mapping decisions makes it difficult to replicate successful results at future appointments. Take the time to photograph your maps, note the specific products used, and document any adjustments you made during application. This record-keeping is invaluable for maintaining consistency and continuously improving your technique.
Elevate Your Lash Artistry with Bespoke Mapping
Mastering bespoke lash mapping techniques is one of the most impactful investments you can make in your lash career. Clients increasingly expect personalized service, and artists who deliver truly customized results command premium pricing, enjoy stronger client loyalty, and build reputations as skilled professionals rather than generic service providers.
The key to success with bespoke mapping is practice, patience, and continuous learning. Start by perfecting your eye shape assessment skills. Practice on friends, family, or models until you can quickly and accurately identify eye shapes and their unique characteristics. Experiment with different mapping approaches for the same eye shape to understand how subtle changes in length progression or curl selection affect the final result.
Invest in quality mapping tools and templates that make the process more efficient and precise. While you can create custom maps freehand, having structured templates as starting points saves time and ensures consistency. Consider taking advanced training courses specifically focused on mapping techniques, as these provide hands-on practice and expert feedback that accelerates your skill development.
Most importantly, commit to treating every client as an individual. Take the time to conduct thorough consultations, create thoughtful custom maps, and communicate clearly about your design choices. This personalized approach not only produces better results but also creates meaningful client relationships that form the foundation of a thriving lash business.
For insights on how to price your customized lash services appropriately, check out our comprehensive guide on lash extension pricing strategy for beginners, which covers how to value your expertise and time when offering bespoke services.
Ready to transform your lash artistry with bespoke mapping techniques? Start implementing these strategies today, and watch as your client satisfaction, retention, and reputation soar. The future of lash extensions is personalized, and mastering bespoke mapping ensures you are leading that future rather than following it.