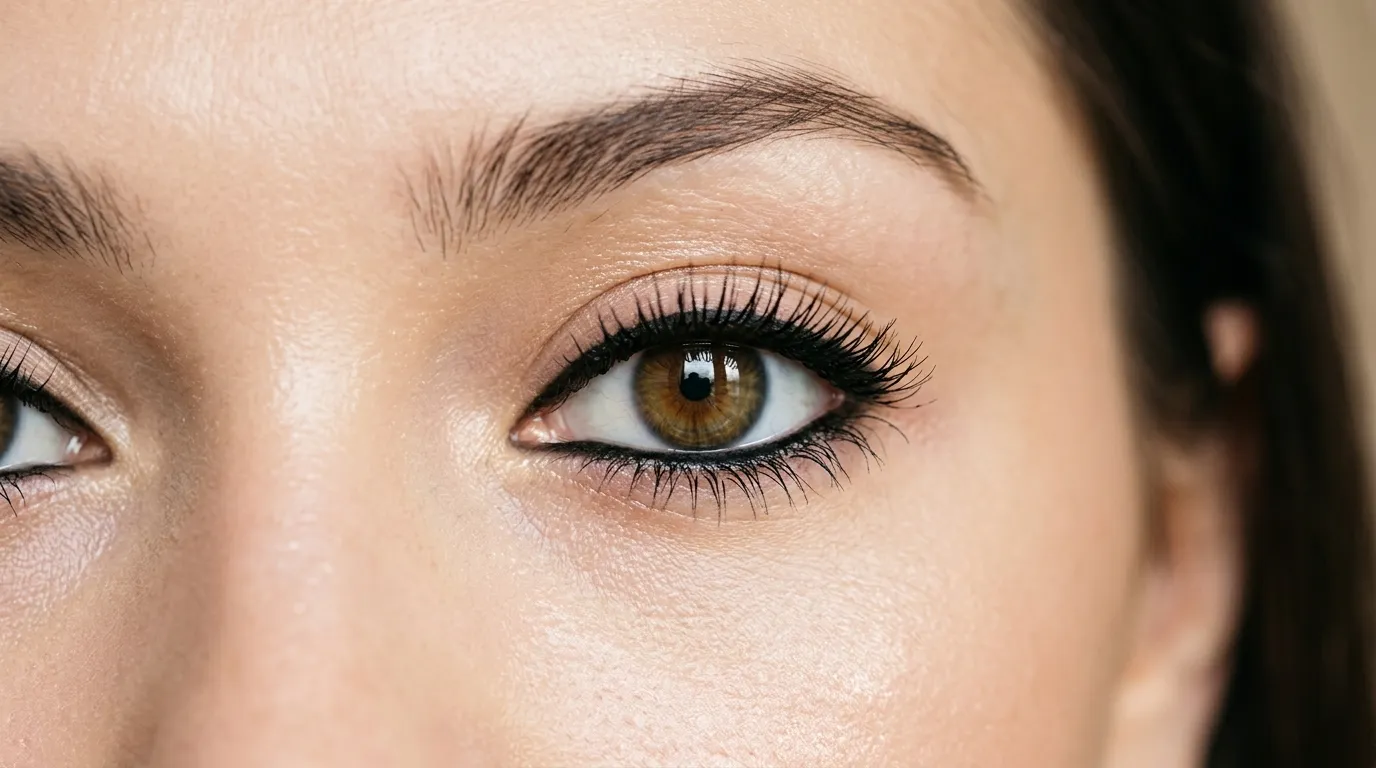
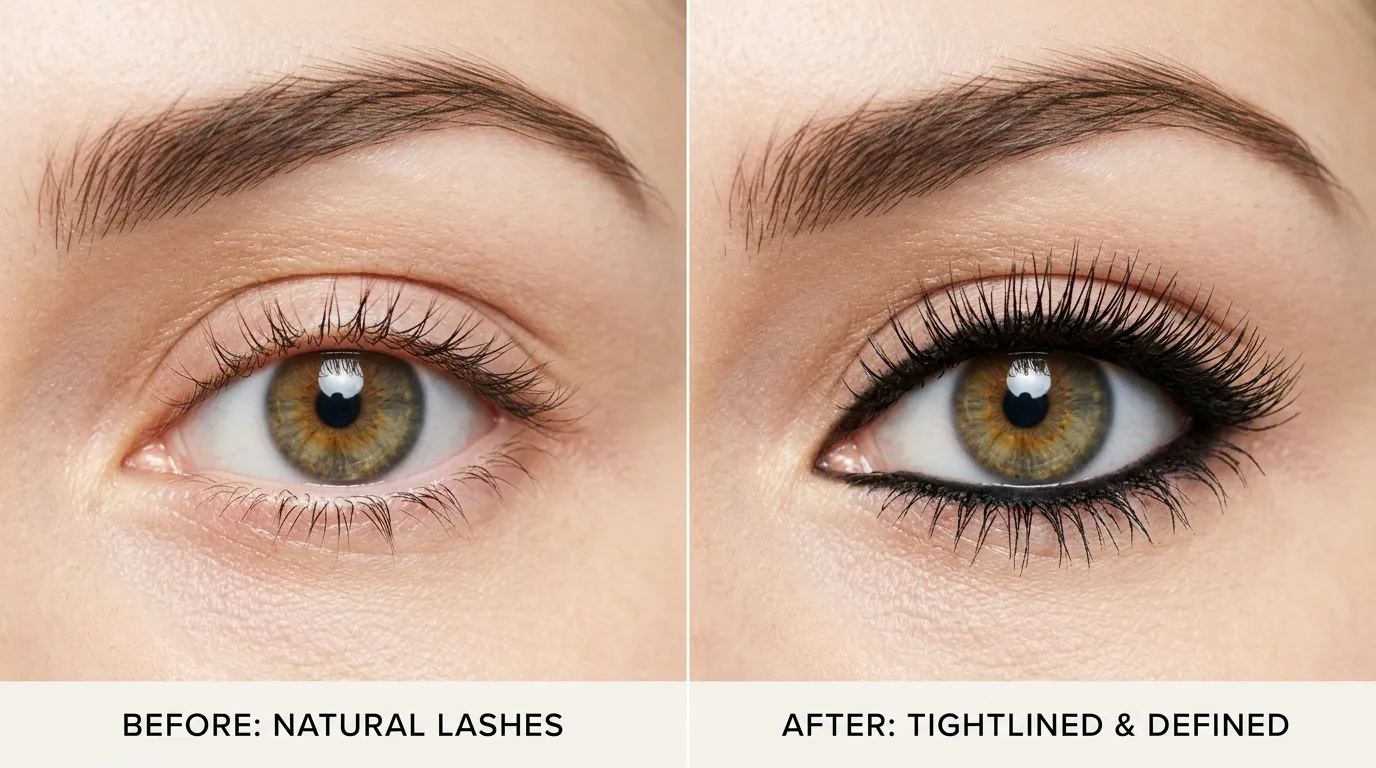
There is one eye makeup technique that professional makeup artists have relied on for decades — yet it remains one of the most underused tricks in most women’s beauty routines. Tightlining is the art of applying eyeliner directly to the upper waterline — the inner rim of your upper lash line — so that the spaces between your lashes fill in and your lashes appear to grow from a dense, dark base rather than pale skin. The result is eyes that look instantly larger, lashes that appear fuller, and a definition that reads as completely natural because there is no visible liner at all.
In 2026, tightlining has returned to the mainstream in a big way. With bold eye looks and defined lash lines trending across runways and social media, understanding how to line your waterline correctly — and safely — is one of the most valuable techniques you can add to your makeup toolkit. This guide covers everything from the basics to advanced tips for every eye shape and lash type.
What Is Tightlining and How Is It Different from Regular Liner?
Tightlining specifically refers to applying eyeliner to the upper waterline — the inner rim of the upper eyelid, right at the base of your upper lashes where the lash roots meet the eye. This is different from applying liner to the upper lash line on top of the lid, and it is different from lining the lower waterline.
When you apply liner along the top of your lid, the effect is visible and intentional — a wing, a line, a defined edge. When you tightline, the liner is hidden inside the lash line. Nobody can see it directly. What they see instead is the effect — lashes that look impossibly thick at the root, eyes that appear larger and more awake, and a definition that seems to come from within rather than sitting on top of the skin. It is, as makeup artists often describe it, the most invisible technique with the most visible result.
Tightlining vs. Tightline and Wing
Many women combine tightlining with a traditional liner application — tightlining first to fill the lash base, then adding a wing or line on top for added drama. This combination approach is particularly effective when you want to wear eyeliner without it looking harsh or disconnected from the lash line. The tightline creates a seamless foundation that makes any liner applied on top look more natural and intentional.
Upper vs. Lower Waterline Tightlining
Upper waterline tightlining is the technique this guide focuses on — it opens and enlarges the eye. Lower waterline lining works differently: a dark liner on the lower waterline makes the eye appear smaller and more intense, while a nude or white liner on the lower waterline makes the eye look larger and more awake. These are separate techniques with different effects, and understanding which you are doing — and why — makes a significant difference to your results.
Why Tightlining Works So Well for Lash Lovers
If you wear lash extensions, get regular lash lifts, or simply invest time and effort into your natural lashes, tightlining is one of the most complementary techniques available to you. Here is why it works so well in the context of lash enhancement.
Extensions and lifted lashes already create definition and length — but the base of the lash line, where the extensions meet the natural lash root, can sometimes appear slightly disconnected or sparse, particularly as a fill appointment approaches. Tightlining fills that visual gap seamlessly. Rather than making the lash line look made-up, it makes the existing lashes look denser and the overall lash effect look more cohesive and freshly done.
For women who wear minimal makeup with their extensions — which is increasingly common as the natural beauty aesthetic dominates 2026 — tightlining is often the only eye makeup step needed. It adds just enough polish to make the eyes feel intentional without adding shadow, wing, or visible liner that might compete with the lash look itself. Understanding how to choose the best lash extension style for your eye shape pairs naturally with tightlining — once you know your eye shape and your most flattering lash map, tightlining becomes the finishing technique that ties the whole look together.
What You Need Before You Start
Choosing the right product is the foundation of a successful tightlining experience. The wrong formula applied to the waterline will either migrate into the eye immediately, disappear within an hour, or cause irritation that makes the technique feel more trouble than it is worth.
Best Eyeliner Types for Tightlining
The upper waterline is a uniquely challenging surface. It is moist, it moves constantly with every blink, and it sits right at the edge of the eye where any migration goes directly into the tear film. Not every eyeliner formula is built for this environment.
Gel Pencil Liners
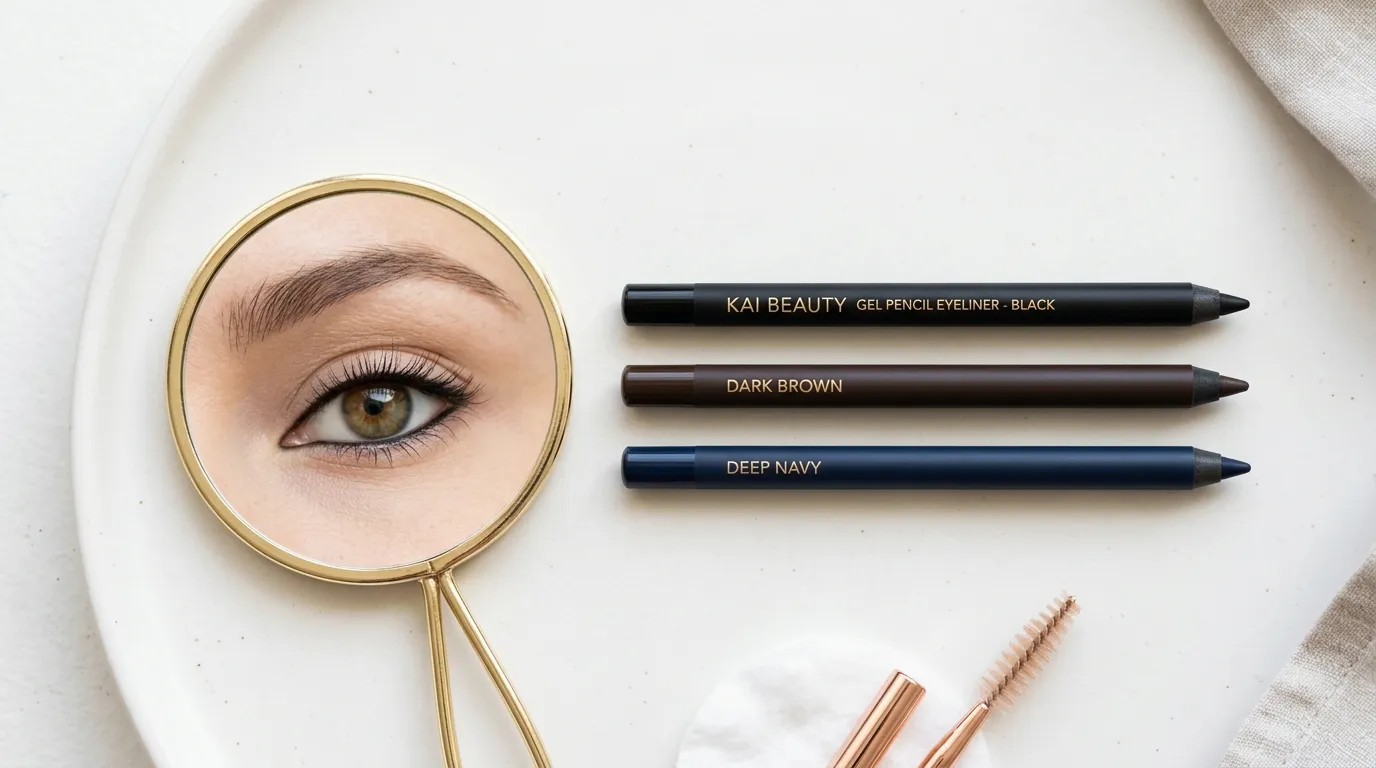
A waterproof gel pencil is the most recommended formula for tightlining by professional makeup artists. Gel pencils glide smoothly over the waterline without tugging, deposit rich pigment in a single pass, and have enough staying power to last through blinking and natural eye moisture. Look for formulas specifically described as waterproof or longwear — standard pencil formulas will smudge and migrate within minutes on the waterline.
Kohl Pencils
Traditional kohl pencils are extremely soft and blend effortlessly into the waterline, making them a good option for a smudged, smoky tightline effect. However, they are significantly less long-wearing than gel pencils and require more frequent touch-ups throughout the day. They are best suited for special occasions or shorter wear periods rather than all-day use.
Liquid and Felt-Tip Liners
Liquid and felt-tip liners are generally not recommended for waterline tightlining. The surface is too wet and mobile for these formulas to adhere correctly, and most will smear immediately upon contact. Stick to pencil or gel formats for this technique.
Colors Beyond Black
Black is the classic tightlining choice and remains the most effective for creating the illusion of density and depth at the lash base. However, dark brown is an excellent softer alternative — particularly for fair skin tones, daytime looks, or anyone wearing brown lash extensions who wants the tightline to complement rather than contrast. Navy and deep plum are two other shades worth experimenting with — they add subtle color without reading as obviously tinted, and they can make blue, green, and hazel eyes appear remarkably vibrant.
How to Tightline Your Upper Waterline Step by Step
Once you have your product ready, the technique itself is straightforward — but the execution requires a steady hand and the right approach on your first few attempts. Read through all the steps before you begin.
Step 1 — Prep Your Eye Area
Start with a clean, dry eye area. If you wear extensions, make sure they are fully dry from any morning cleansing before you begin. Any residual moisture or product near the lash line will prevent the liner from adhering properly to the waterline. Do not apply eye cream or primer to the waterline itself — save those for the orbital bone area only.
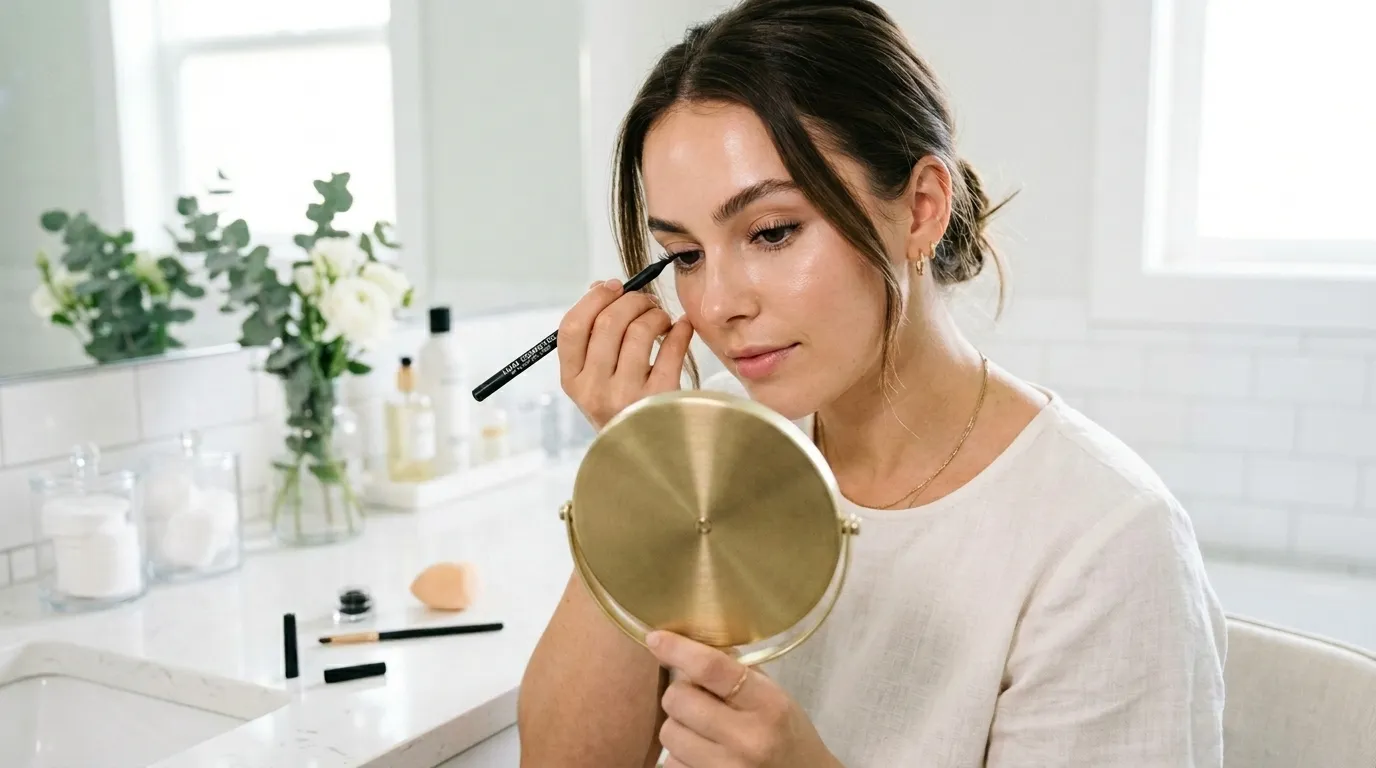
Step 2 — Position Your Mirror Correctly
This step makes a larger difference than most beginners expect. Position a magnifying mirror at eye level or slightly below rather than above. Looking down into a mirror that is positioned below your eye level naturally exposes the upper waterline, making application significantly easier and more precise than trying to work from above. If you have always struggled with tightlining, an incorrectly positioned mirror is often the entire reason.
Step 3 — Lift Your Upper Lid Gently
Using the index finger of your non-dominant hand, gently lift the skin of your upper lid upward — just enough to expose the upper waterline clearly. Do not stretch or pull the skin sideways, as this distorts the lash line and makes accurate placement harder. A gentle upward lift is all you need to bring the waterline into clear view.
Step 4 — Apply Liner in Short Strokes
Hold your liner pencil like you would hold a pen — firmly but not tightly — and apply the product directly to the exposed upper waterline using short, dabbing strokes rather than one continuous line. Start from the outer corner and work inward toward the inner corner, filling in the gaps between individual lash roots as you go. You are not drawing a line on top of the skin — you are filling in the spaces between the lashes at the innermost point of the lash base.
Take your time on the inner third of the eye, which is the most technically challenging section due to the proximity to the tear duct. Small dabbing motions work better than trying to drag the pencil across this area in one stroke.
Step 5 — Check and Fill Any Gaps
Once you have completed the first pass, open your eye fully and check in the mirror for any uneven sections or gaps where the pale skin between lashes is still visible. Go back and fill these sections with targeted dabbing strokes. Two or three lighter passes will always look more natural and last longer than one heavy application.
Step 6 — Set with a Matching Shadow (Optional)
For extended wear — particularly in humid climates or on long days — pressing a small amount of matching dark eyeshadow over the tightlined area using a fine-tipped brush or your fingertip helps set the liner and significantly extends its longevity. This step is especially useful for anyone in warm or tropical environments where eye makeup tends to migrate faster. If lash retention in your climate is already a concern, the same environmental factors that affect your extensions can affect your liner — the post on lash retention in humid climates covers the broader picture of how to manage eye area makeup in challenging weather conditions.
Tightlining Tips for Different Eye Shapes
While the basic technique is the same for every eye shape, small adjustments to where you start and stop your tightline can make a significant difference to the final result depending on your eye shape.
Almond Eyes
Almond eyes are the most versatile shape for tightlining — the technique works beautifully with a full upper waterline application from inner to outer corner. If you want to elongate the eye, extend the tightline slightly past the outer corner lash root toward the outer edge.
Round Eyes
For round eyes, concentrate your tightlining on the outer two-thirds of the upper waterline and keep the inner corner lighter or bare. This draws the visual weight of the liner outward, creating an elongating effect that counterbalances the natural roundness of the eye shape.
Hooded Eyes
Hooded eyes benefit enormously from tightlining because the technique adds definition that remains visible even when the hood covers the lid. Since visible lid space is limited on hooded eyes, tightlining is often the most effective eye makeup technique available — it creates definition without requiring lid space to show it off. Keep the application precise and avoid any smudging upward, which can disappear under the hood entirely.
Close-Set Eyes
For close-set eyes, skip the inner corner entirely and begin your tightline at the center of the upper waterline, working outward. Tightlining the inner corner on close-set eyes can make the eyes appear even closer together — starting from center keeps the definition where it creates the most flattering effect.
Wide-Set Eyes
Wide-set eyes benefit from a full upper waterline tightline including the inner corner. Filling in the inner corner thoroughly helps draw the eyes slightly inward visually, creating a more balanced and symmetrical appearance.
Tightlining Safety — What You Need to Know
Because tightlining involves applying product directly to the inner rim of the eye, safety is a genuine consideration — not something to skip over in the interest of getting to the technique quickly.
Is Tightlining Safe for Eyes?
Tightlining is considered safe when performed correctly with products specifically formulated for use near the eye. The primary risk is introducing bacteria to the eye area through contaminated products or unsanitary application. The American Academy of Ophthalmology advises replacing eye makeup products regularly and never sharing them with others — advice that applies with particular importance to any product used on the waterline.
Key Safety Rules to Follow
- Replace your tightlining pencil every three months regardless of how much product remains
- Never apply liner to the waterline of an eye that is irritated, red, or infected
- Sharpen your pencil before each use to expose a fresh, uncontaminated surface
- Remove all waterline liner thoroughly at the end of each day using a gentle oil-free eye makeup remover
- Never apply tightlining liner to the lower waterline with the same pencil tip used on the upper without resharpening in between — cross-contamination between upper and lower waterlines increases infection risk
- If you wear contact lenses, insert them before applying any eye makeup including tightliner, and remove them before makeup removal
Tightlining with Lash Extensions
Tightlining is generally compatible with lash extensions as long as the liner is applied carefully to the waterline only and does not migrate onto the lash bond area. Use a waterproof gel pencil — non-waterproof formulas contain oils and waxes that can break down lash adhesive if they migrate toward the extension base. Remove liner gently at the end of the day using a lint-free applicator and an oil-free micellar solution, taking care not to rub or tug at the lash line. For a complete picture of what your lash extension aftercare routine should look like, the ultimate beginner’s guide to eyelash extension aftercare covers every step of safe daily care from cleansing through to liner removal.
Tightlining Is Worth Mastering
Of all the eye makeup techniques available to you, tightlining delivers one of the highest impact-to-effort ratios. It takes fewer than two minutes once you have the technique down, requires only one product, and produces a result — fuller-looking lashes, larger eyes, more polished definition — that would otherwise require multiple additional makeup steps to achieve. Whether you wear it alone for a no-makeup makeup effect or layer it beneath a full liner look for added depth, tightlining is the kind of technique that quietly elevates everything else you are already doing with your eyes. Give it a week of consistent practice and it will earn a permanent place in your daily routine.
For more on how to build a complete eye-enhancing routine around your natural lash and extension look, the guide on how to properly apply mascara and eye makeup covers the full sequence of eye makeup application that works alongside tightlining for a polished, cohesive finish. For an authoritative overview of eyeliner types, formulas, and application methods, the Byrdie guide to applying eyeliner is one of the most comprehensive and regularly updated references available.