
The smoky eye has earned its reputation as one of the most universally flattering makeup looks ever created — and one of the most feared by beginners. There is a reason it has stayed relevant for decades across every beauty era, every trend cycle, and every generation of makeup wearers: when it is done well, it makes every eye shape look more defined, more dramatic, and more alluring. When it goes wrong, it looks smudged, muddy, and unintentional in the worst possible way.
The good news is that the difference between a smoky eye that looks effortlessly polished and one that looks like a mistake almost always comes down to technique rather than talent. With the right products, the right sequence of steps, and an understanding of a few key blending principles, a beginner can absolutely achieve a beautiful smoky eye — and this guide is going to show you exactly how.
What Makes a Smoky Eye Actually Work
Before picking up a single brush, it helps to understand what a smoky eye actually is at its core. The defining characteristic of a smoky eye is gradient blending — the transition from a dense, dark color at the lash line through progressively lighter, more diffused color as it moves upward toward the brow bone. That gradient is what creates the depth, the drama, and the dimensional quality that makes the look so striking.
The most common beginner mistake is applying dark eyeshadow to the lid and stopping there without blending the edges. This creates a hard, patchy shape rather than a smooth transition — and that hard edge is what makes a smoky eye look unfinished rather than intentional. Every step in the process below is designed to build and blend that gradient so it reads as seamless and deliberate from every angle.
Classic vs. Modern Smoky Eye
The classic smoky eye uses deep charcoal, black, or deep brown shades concentrated at the lash line and blended through the crease. The modern 2026 interpretation is more flexible — monochromatic berry, plum, bronze, and even terracotta smoky eyes are all having significant moments right now, and the blending technique is identical regardless of the colors used. This guide focuses on the classic dark smoky eye because mastering it gives you the foundational skills to execute any color variation with confidence.
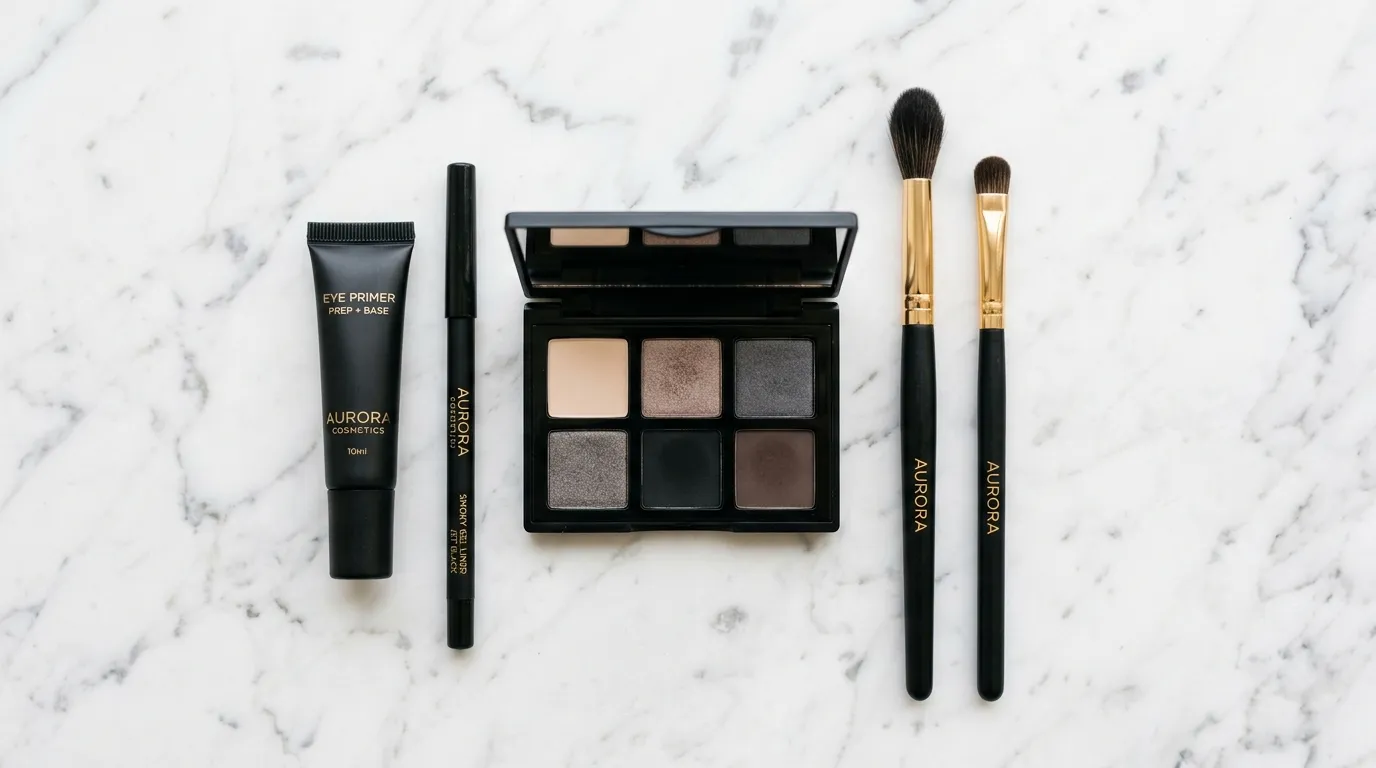
The Products You Need
You do not need an enormous collection to create a beautiful smoky eye. A focused selection of the right products will take you much further than a large palette used incorrectly.
Eyeshadow
For a classic smoky eye you need three tones: a light shade for the brow bone and inner corner highlight, a medium transition shade in a warm or cool neutral that sits in the crease, and a dark shade for the lid and lower lash line. You do not need to buy these separately — most medium-sized eyeshadow palettes contain all three in a single purchase. Look for a palette that includes a matte or satin transition shade, a deep matte or shimmer for the lid, and a light highlight shade. Highly pigmented, blendable formulas will always outperform budget powders that apply sheer and patchy.
Brushes
Two brushes are the non-negotiable minimum for a smoky eye. A fluffy crease brush — a rounded, dome-shaped brush with loosely packed bristles — does the blending work that creates the gradient effect. A flat shader brush — a denser, more tightly packed brush — packs color onto the lid with precision and intensity. A third brush — a small, pointed detail brush — is useful for the lower lash line but is not essential for a first attempt. Clean brushes blend better than dirty ones, so if you only take one maintenance step seriously, make it keeping your blending brush clean.
Eye Primer
Eye primer is the single most underestimated product in any eyeshadow routine — and for a smoky eye specifically, it is genuinely non-negotiable. Primer creates a grippy, smooth surface that allows eyeshadow to adhere evenly, prevents creasing throughout the day, and intensifies color payoff so your dark shades appear rich and pigmented rather than grey and dull. Apply a thin layer across the entire lid from lash line to brow bone before touching any shadow.
Eyeliner
A smoky eye almost always looks more polished with eyeliner at the lash line — either a gel pencil smudged into the lash roots or a liquid liner for a crisper definition depending on how soft or sharp you want the overall effect. A gel pencil applied along the upper lash line and smudged slightly with a brush or fingertip integrates beautifully with the blended shadow above it. For anyone who wants to add definition at the waterline, the technique covered in the guide on tightlining your waterline for bigger-looking eyes is a perfect complement to a smoky eye — filling in the upper waterline makes the lashes appear to emerge from a dark, dense base that intensifies the overall smoky effect significantly.
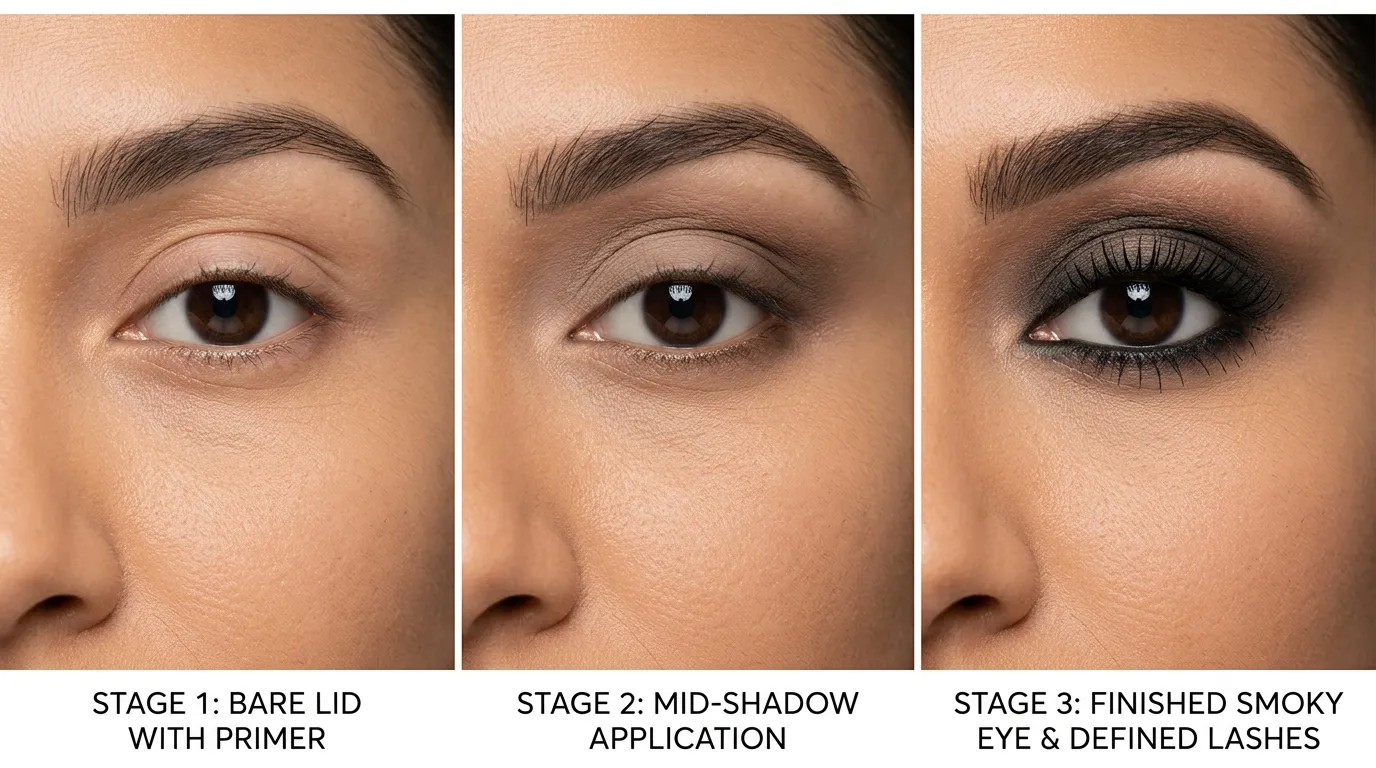
Step-by-Step Smoky Eye for Beginners
Work through these steps in order. Each step builds on the one before it, and skipping ahead or changing the sequence is the most reliable way to end up with a result you are not happy with.
Step 1 — Apply Eye Primer
Using your fingertip or a flat brush, apply a thin, even layer of eye primer across the entire lid from the lash line to just below the brow bone. Pat it in gently rather than dragging — dragging can move the product unevenly and create patchy areas. Allow it to set for thirty seconds before moving to the next step. If you do not have a dedicated eye primer, a thin layer of concealer set with translucent powder will work as a functional substitute.
Step 2 — Apply Your Transition Shade
Load your fluffy crease brush with your medium transition shade — a warm taupe, soft brown, or cool grey depending on your preferred palette direction. Tap off any excess powder before applying, then work the shade into the crease of your eye using windshield-wiper motions — sweeping the brush back and forth horizontally through the crease rather than pressing it in place. This motion builds color gradually and creates the soft, blended edge that you will blend your dark shade into later. The transition shade should cover the crease and extend slightly above it, fading out before it reaches the brow bone.
Step 3 — Pack Your Dark Shade onto the Lid
Switch to your flat shader brush and load it with your darkest shade. Press — do not sweep — the color onto the lid from the lash line upward to just below the crease. Pressing packs the pigment densely onto the lid, which is what creates the intensity and richness of a true smoky eye. Work in sections if needed, building the color in layers rather than trying to achieve full opacity in one pass. At this stage the edges will look unblended and slightly harsh — that is completely normal and exactly what the next step addresses.
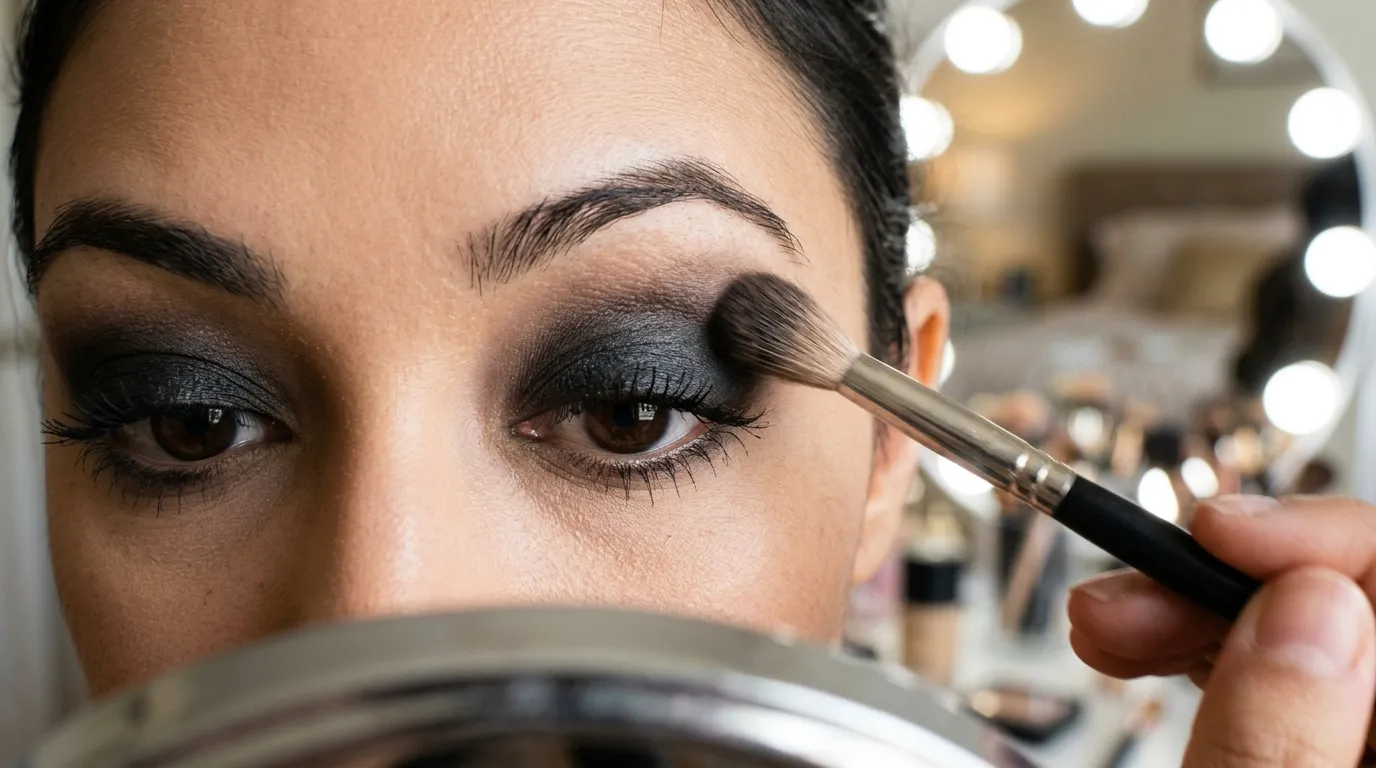
Step 4 — Blend the Edges
This is the most important step and the one that separates a polished smoky eye from a patchy one. Using your clean fluffy crease brush — with no additional product on it — blend the upper edge of the dark lid shade into the transition shade using the same windshield-wiper motion. The goal is to eliminate the visible boundary between the two shades so the transition appears seamless and gradual. Use a light hand and work in small sections. You are not trying to move the dark color upward — you are softening and diffusing the edge where the two shades meet.
Step 5 — Deepen the Outer Corner
For added drama and a lifted effect, load your shader brush with a small amount of the dark shade and press it into the outer corner of the eye — the V-shaped area where the upper and lower lash lines meet. Blend this into the existing lid color and slightly upward into the crease at the outer corner. This creates the classic smoky eye shape that elongates and lifts the outer eye — and it is the detail that most often distinguishes a professional-looking result from a flat, one-dimensional application.
Step 6 — Highlight the Brow Bone and Inner Corner
Apply your light highlight shade to the brow bone — the area just below the arch of the brow — and to the inner corner of the eye. Use a clean fingertip or a small flat brush to press the highlight into the inner corner precisely. This step creates the contrast that makes the dark lid color appear richer and more intentional, and it opens up the eye by drawing light to its brightest natural point. A soft satin or subtle shimmer finish on the highlight shade works beautifully for this step — a matte highlight can sometimes read as flat against the dimensional dark shadow.
Step 7 — Line and Define the Lash Line
Apply your gel pencil liner along the upper lash line, pressing it into the base of the lashes. You do not need a precise, sharp line for a smoky eye — a slightly smudged application that blurs into the shadow above it actually looks more cohesive and intentional with this style. Run the same pencil along the lower lash line as well, smudging it slightly downward with a small brush or fingertip for a lived-in, diffused lower lash effect that ties the upper and lower eye together.
Step 8 — Apply Mascara
Finish with two coats of mascara on the upper lashes, concentrating on the roots and building outward. The lashes are the final frame of the entire look — full, defined lashes complete a smoky eye in a way that no amount of additional shadow can replicate. If you wear extensions, a single coat of extension-safe mascara applied only to the tips is sufficient — the extensions themselves already provide the density and definition the look needs.
Common Smoky Eye Mistakes and How to Fix Them
Even with the best technique, things occasionally go sideways. Knowing how to course-correct in the moment saves the look and saves your patience.
The Shadow Looks Muddy
Muddy shadow almost always happens when too many different colors are blended together without adequate transition shades between them, or when dirty brushes transfer residual color from previous applications into fresh shadow. Use one brush per color where possible, and invest a few seconds in tapping off excess product before applying each shade. If the look is already muddy, pressing a small amount of your transition shade over the muddied area with a clean brush can neutralize the color confusion and restore definition.
The Shadow Has Fallen Under the Eye
Fallout — the fine particles of eyeshadow that drop onto the under-eye area during application — is one of the most frustrating aspects of working with dark pigments. The most effective prevention is to do your eye makeup before your base makeup so any fallout can be swept away cleanly before you apply foundation. If fallout has already landed on finished base makeup, use a clean fluffy brush to sweep it away gently rather than rubbing, which will smear the particles into the skin.
The Look Fades or Creases Within Hours
Fading and creasing are almost always a primer issue. If your smoky eye is disappearing by midday, your primer either was not applied evenly, was not given enough time to set, or was applied in too thin a layer to grip the shadow effectively. A second thin layer of primer allowed to set for a full minute before shadow application solves this for the vast majority of people.
Adapting the Smoky Eye for Your Eye Shape
The basic technique above works for all eye shapes, but small adjustments to placement create results that are more specifically flattering for different eye shapes.
Hooded Eyes
On hooded eyes, place your dark shade slightly higher on the lid than feels intuitive — the hood will cover some of the lid space when the eye is open, so applying the dark shade higher ensures it remains visible. Keep the outer corner deepening step concentrated and angled slightly upward to counteract any downward pull from the hood.
Round Eyes
Concentrate the darkest shadow at the outer corner and extend it upward and outward to elongate and add a cat-eye effect to the smoky shape. Keeping the inner corner lighter and more highlighted emphasizes the elongation further.
Small or Deep-Set Eyes
Use medium rather than very dark shades on the lid to avoid making small or deep-set eyes appear smaller. Concentrate depth at the outer corner only and keep the inner two-thirds of the lid in a medium tone. A generous inner corner highlight is particularly important for this eye shape.
For a complete picture of how eye shape influences every aspect of your eye makeup and lash choices — from smoky eye placement to extension style to liner angle — the guide on best lash styles by eye shape covers the full spectrum of how to work with your natural eye shape across every technique.
Your First Smoky Eye Will Not Be Your Last
The smoky eye is one of those techniques that genuinely improves with repetition in a way that almost no other makeup skill does. Your first attempt will teach you something your second attempt will benefit from — and by the fifth or sixth time you work through these steps, the process will feel fluid, intuitive, and fast. Start with neutral shades on a day when you have time and no pressure, follow the steps in sequence, and focus on blending over everything else. The intensity of the color matters far less than the quality of the blend — a beautifully blended neutral smoky eye will always outperform a harsh, dark one with visible edges.
For authoritative guidance on eyeshadow blending techniques and product recommendations from professional makeup artists, the Allure step-by-step smoky eye guide is one of the most comprehensive and regularly updated references available. And once you have your smoky eye technique down, the next natural step is learning how your mascara choice interacts with the look — the breakdown of brown mascara vs. black mascara covers exactly how to choose the right lash shade to finish a smoky eye for your specific coloring.