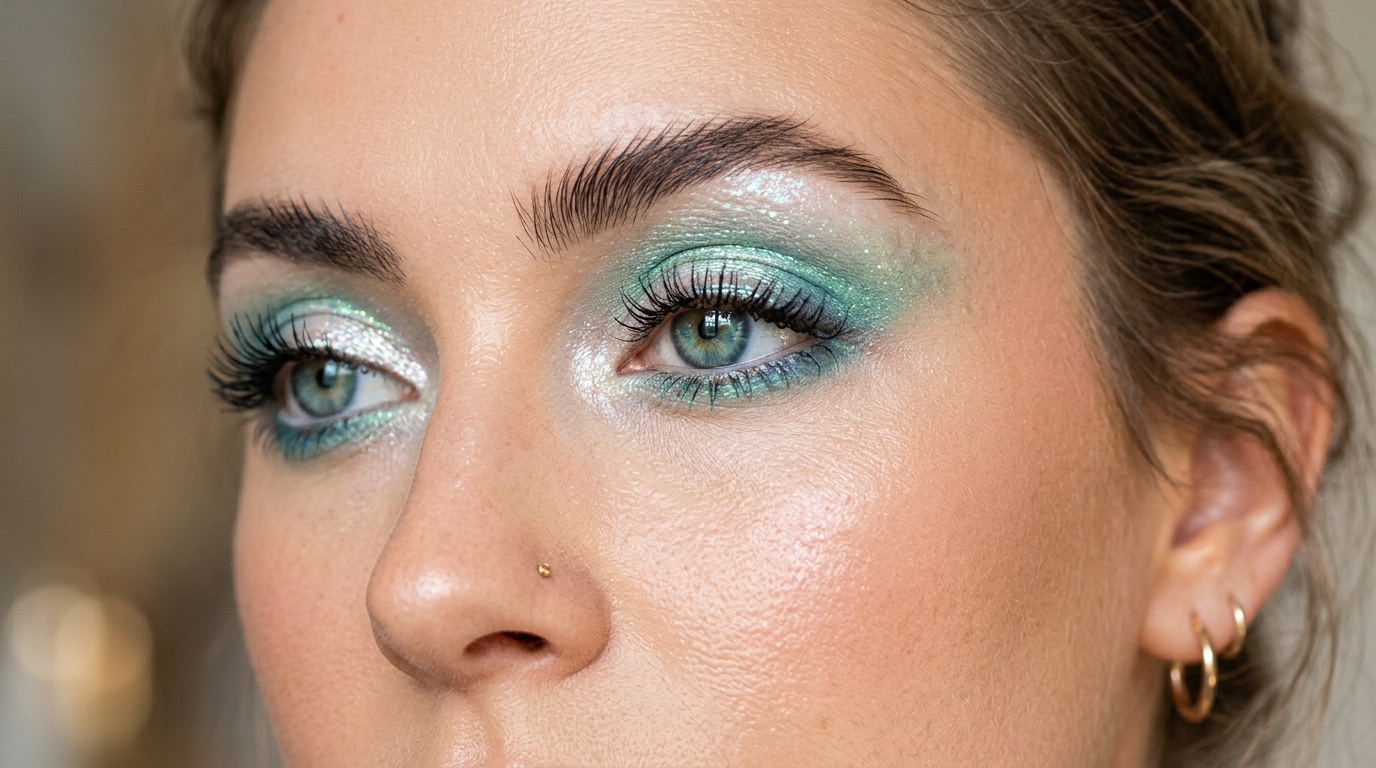
Every summer has a beauty moment that captures the collective imagination — a look that appears across every feed, every festival, every beach photo, and every editorial spread simultaneously. In Summer 2026, that moment belongs to the mermaid eye. Defined by iridescent, aqua, teal, and pearl tones applied with a luminous, wet-finish quality that makes the eye appear to shimmer and shift with every movement, the mermaid eye is the look that has officially replaced the bronzed, neutral summer eye that dominated for the past several seasons.
The appeal is immediate — the mermaid eye is maximally beautiful in natural light, photographs extraordinarily well, and carries a sense of fantasy and effortful glamour that summer makeup rarely achieves without feeling costume-like. But it is also more wearable than it first appears. The key is in the specific tones used, the finish quality of the products, and the technique that keeps the look luminous and ethereal rather than heavy and overdone. This guide covers everything — from the essential products and the step-by-step application, through to adaptations for different eye colors, skin tones, and occasions.
What Defines the Mermaid Eye Trend in 2026
The mermaid eye is not simply any blue or green eyeshadow — it has specific aesthetic qualities that distinguish it from a standard colorful eye look and give it its characteristic otherworldly quality.
The Iridescent Shift Quality
The most defining characteristic of the mermaid eye is its iridescent, color-shifting quality — the appearance of multiple tones within a single product, or across a blended combination of products, that changes as the light catches it from different angles. This shift quality is what creates the impression of scales, of water moving over a surface, of light refracting through something luminous. Products described as duochrome, multichrome, shift, or iridescent — those that appear to change from teal to gold, from aqua to violet, from seafoam to silver as the angle changes — are the technical foundation of the mermaid eye look.
Standard shimmer or glitter products do not produce this quality — they reflect light at a fixed color rather than shifting across multiple tones. The iridescent shift is the specific property to look for when building a mermaid eye product selection, and it is what separates a genuinely stunning mermaid eye from a blue-green eyeshadow look that simply resembles the trend.
The Wet, Luminous Finish
The second defining quality of the mermaid eye is its wet, glass-like finish — the appearance of moisture and luminosity that suggests depth rather than a dry, powdery surface. This wet quality is most reliably achieved through cream, liquid, and foil eyeshadow formulas rather than pressed powders, and through specific application techniques — including applying loose pigments over a sticky base or pressing product with a wet brush — that maximize the reflective surface of the pigment particles. The finished eye should look like it is still slightly wet, catching light in a deep, almost three-dimensional way.
The Color Palette
The 2026 mermaid eye palette is anchored in aqua, teal, seafoam green, cobalt blue, and deep ocean navy — the core ocean-inspired tones that create the unmistakable mermaid association. These are supported by iridescent white, silver, and pale gold highlights that create the pearl and sea-glass quality of the look, and occasionally deepened with emerald or midnight blue at the outer corner for drama. Purple-toned duochrome shimmers that shift between blue and violet add a more ethereal, fantastical dimension that bridges the trend toward the evening occasions where the mermaid eye is most spectacular.
The Products You Need for a Mermaid Eye
Building the right product selection before starting ensures the application produces the specific iridescent, wet-finish quality the look requires rather than a heavy, glittery approximation of it.
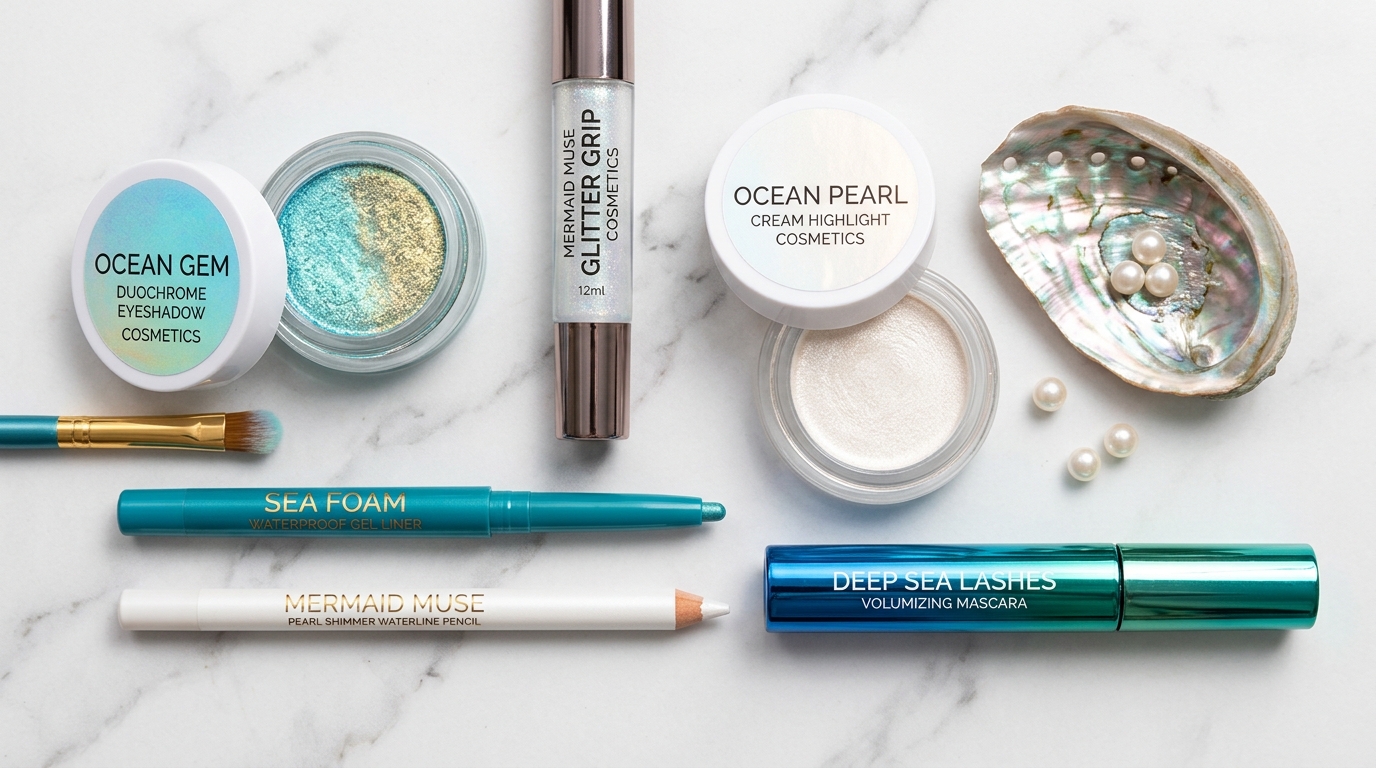
Iridescent or Duochrome Eyeshadow
An iridescent or duochrome eyeshadow in the aqua-teal-seafoam range is the foundational color product of the mermaid eye. Look specifically for products with a multichrome or color-shift property — descriptions like “shifts from teal to gold,” “duochrome blue-green,” or “iridescent aqua” in the product description. Cream formulas provide the wet-finish quality most naturally. Loose pigments pressed with a damp flat brush produce maximum metallic intensity. Pressed powder shimmer shadows in the right color range can work effectively but require a wet brush application technique to achieve the depth and luminosity the look requires.
A Sticky Eye Base or Glitter Glue
A sticky eye base or glitter glue applied to the lid before any shadow is the technical foundation that makes the mermaid eye’s wet, intensely luminous quality possible — particularly for loose pigment and glitter applications. The sticky base creates a surface that pigment particles adhere to evenly and densely, preventing fallout and ensuring the maximum number of pigment particles catch light simultaneously — which is what creates the deep, multi-dimensional luminosity rather than a sparse, patchy shimmer. Apply a thin, even layer of eye base — or a small amount of glitter glue — to the entire lid and allow it to become slightly tacky before pressing any iridescent product over the top.
Pearl and Silver Highlight
A finely milled pearl or silver highlight — in either a cream or foil-finish powder — is essential for the inner corner and brow bone placement that creates the luminous, open-eye quality that defines the mermaid look’s best interpretations. The highlight in the inner corner specifically is what creates the impression of light coming from within the eye — a quality that references the way light refracts through water and gives the mermaid eye its fantastical, otherworldly dimension.
Waterproof Liner in Teal, Navy, or Black
A waterproof gel or liquid liner in teal, navy, or deep black defines the lash line and creates the framing that gives the mermaid eye its structure beneath the more diffused shadow work. Teal liner — applied to both the upper lash line and smudged along the lower lash line — creates the most immersive, fully mermaid-themed result. Navy works for a slightly more wearable interpretation that maintains the ocean color story with less intensity. Black is the most everyday-compatible option and allows the shadow colors to be the primary statement without adding an additional colored element at the lash line.
Volumizing Mascara
Full, defined lashes are an essential element of the mermaid eye — the lash density frames the iridescent shadow and creates the contrast that makes the color appear even more vivid and luminous by comparison. A volumizing black mascara provides the richest contrast against the aqua and teal tones of the shadow. Two generous coats on the upper lashes and a single defining coat on the lower lashes complete the framing that the look requires. The guide on how to layer mascara for a false lash effect covers the specific layering technique that builds the most impactful lash density to complement a statement eye look like the mermaid eye.
Step-by-Step Mermaid Eye Application
The following sequence builds the mermaid eye from base preparation through to the finished look — with specific technique notes at each step that address the application choices that most determine whether the result achieves the luminous, wet-finish quality the trend requires.
Step 1 — Prime and Base the Lid
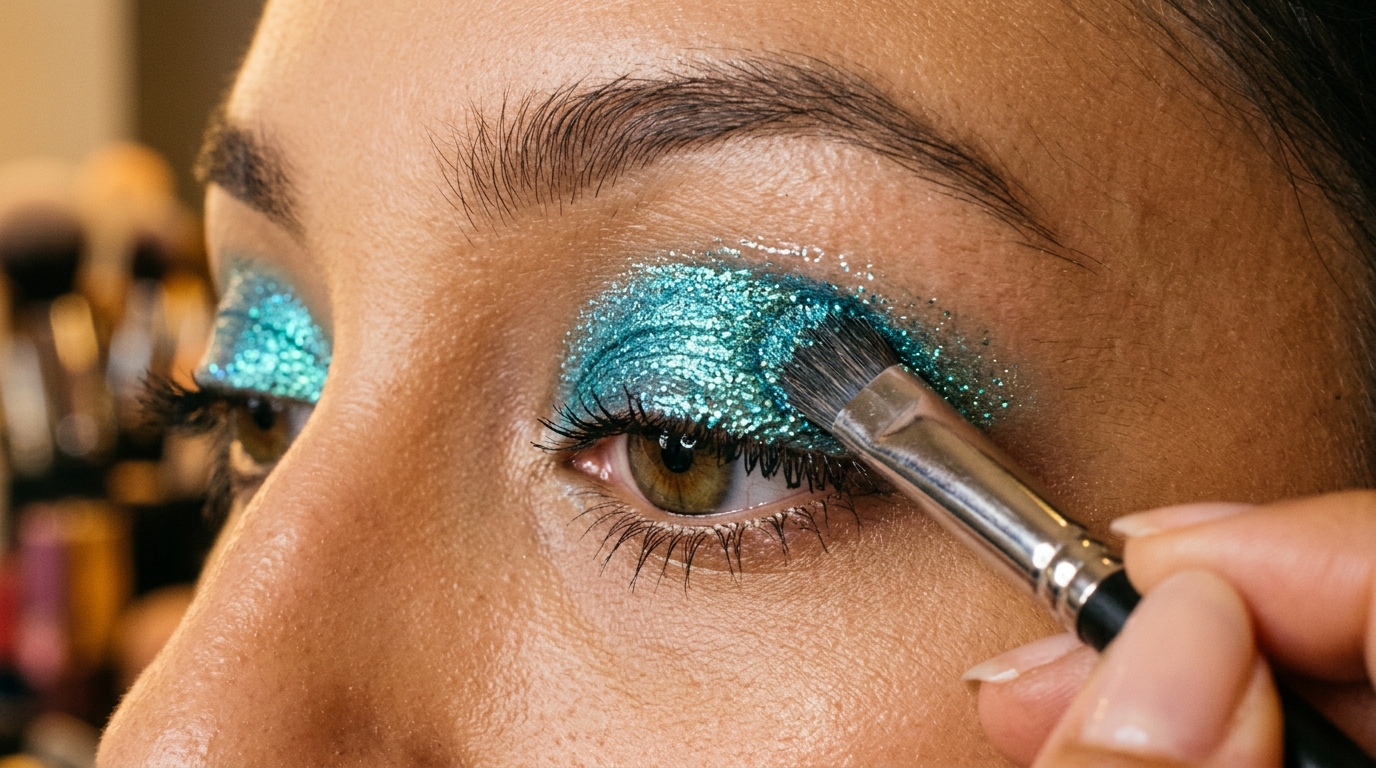
Apply a thin layer of eye primer across the entire lid — from lash line to brow bone — and allow it to set for sixty seconds. Follow immediately with a thin, even application of glitter glue or sticky eye base specifically on the visible lid area — the zone where the mermaid shadow will be placed. Allow this base to become slightly tacky rather than fully dry before adding any shadow — the tackiness is what creates the adhesion that produces the intensely pigmented, dense shimmer coverage the mermaid eye requires.
Step 2 — Place Your Primary Iridescent Shade
Using a flat, dense eyeshadow brush or your fingertip — pressed firmly rather than swept — pack your primary iridescent aqua or teal shade onto the lid over the tacky base. The pressing and patting motion is critical — sweeping the brush across the lid drags the pigment rather than adhering it densely, producing a lighter, patchier result than pressing achieves. Work from the center of the lid outward and then from the center inward, building dense coverage in the middle of the lid first and then extending toward the corners. The coverage should be rich, reflective, and solid — light should not be able to penetrate through to the skin beneath.
Step 3 — Deepen the Outer Corner
Using a smaller flat brush or your fingertip, press a deeper shade — emerald, deep teal, or midnight navy — into the outer corner of the lid and blend it upward and outward toward the outer edge of the crease in a C-shape. This deeper outer corner creates the dimension and depth that makes the mermaid eye look genuinely three-dimensional rather than flat — the same principle of outer corner deepening that creates depth in a traditional eye look, applied here with ocean-toned colors that maintain the mermaid color story throughout.
Step 4 — Add the Inner Corner Pearl
Press a generous amount of your pearl or silver highlight into the inner corner of the eye — using a flat brush or your fingertip for the densest possible deposit. The inner corner highlight in a mermaid eye should be significantly more intense than in a natural or everyday look — this is one of the key placements where more product produces a better result, as the dense, reflective highlight creates the specific focal point of light that the mermaid aesthetic requires. Extend the highlight slightly upward onto the inner brow bone for a seamless connection between the lid highlight and the brow bone luminosity.
Step 5 — Define the Lower Lash Line
Apply your teal, navy, or black liner along the upper lash line — keeping the application close to the root for definition without heavy opacity on the lid that would compete with the shadow. Then, using either a small smudge brush loaded with your primary iridescent shade or a soft kohl pencil in teal, run a soft, smudged line of color along the lower lash line from the outer corner inward — stopping at the midpoint of the eye to maintain the open, bright quality of the inner eye. Blend the lower lash line color slightly downward with a small brush to create the soft, diffused lower definition that connects the upper and lower eye without creating a harsh, closed-in effect.
Step 6 — Apply the Nude or White Waterline
A nude or white pencil on the lower waterline — the inner rim of the lower lid — is the single step that transforms the mermaid eye from potentially overwhelming to genuinely beautiful and wearable. The nude waterline opens the eye dramatically, creates a strong contrast against the teal or navy lower liner above it, and maintains the bright, open quality that prevents the iridescent shadow from making the eye appear heavy or closed. Do not skip this step — it is the technical element that makes the mermaid eye work as a wearable, flattering look rather than a costume-adjacent one.
Step 7 — Mascara
Apply two generous coats of volumizing black mascara to the upper lashes and one defining coat to the lower lashes. Allow each coat to partially dry before the next to prevent clumping. The mascara frames the entire mermaid eye composition and creates the rich contrast between dark lashes and luminous iridescent shadow that makes the color appear even more vivid and luminous by contrast.
Adapting the Mermaid Eye for Different Features
The mermaid eye’s specific color palette interacts differently with different eye colors and skin tones — and small adjustments produce results that are genuinely flattering for specific features rather than simply trend-compliant.
For Brown Eyes
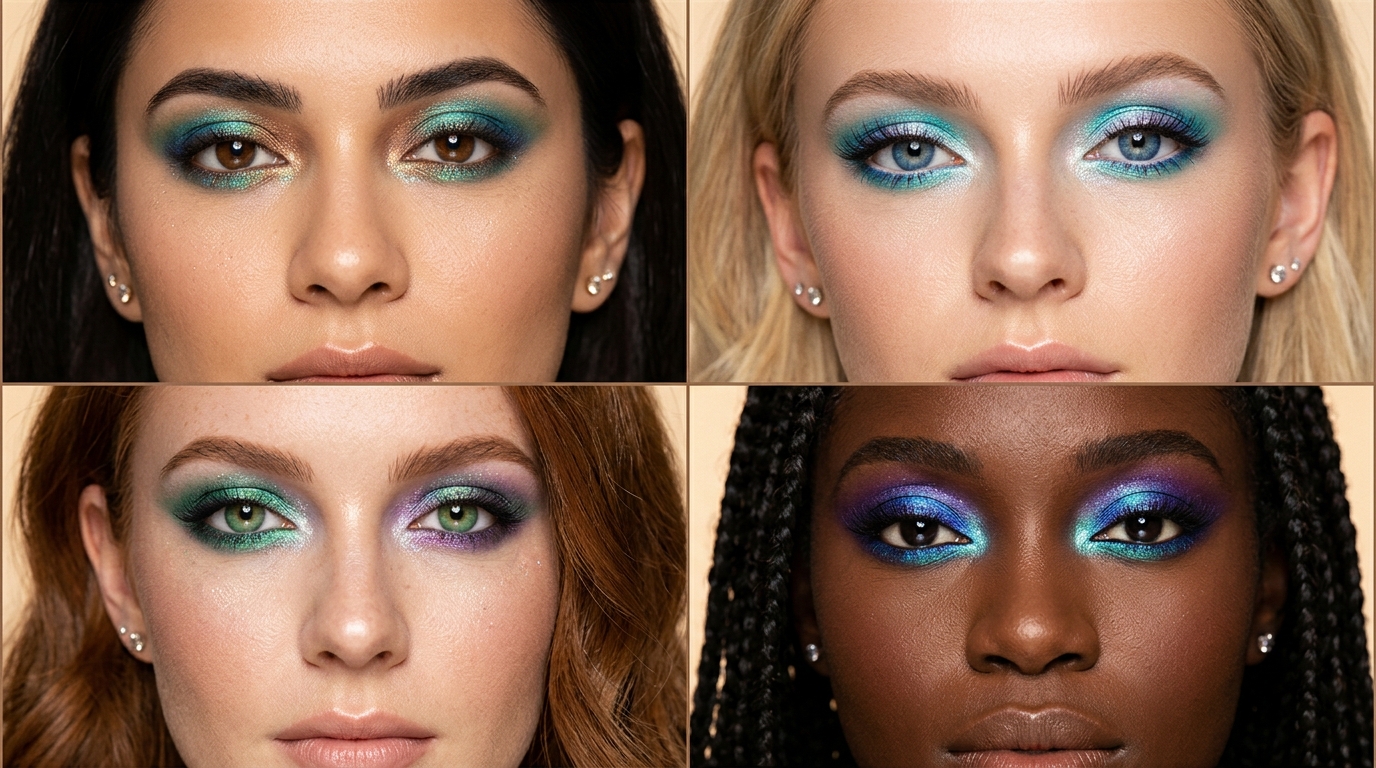
Aqua and teal shadows create an extraordinary complementary contrast against brown irises — the cool ocean tones directly opposite warm brown on the color wheel, making the iris appear more vivid and saturated than almost any other shadow color. Brown-eyed wearers can handle the most intense, saturated versions of the mermaid palette and will achieve the most dramatic results of any eye color. Deepen the outer corner with a rich emerald or midnight navy for maximum iris-enhancing contrast.
For Blue and Grey Eyes
For blue and grey eyes, the mermaid palette requires slightly more careful shade selection to avoid the aqua and teal tones blending too closely with the iris color — creating a same-tone effect that reduces rather than enhances the eye color’s impact. Choose seafoam and pearl-green tones that are slightly warmer or lighter than the natural eye color, and lean into the silver-gold iridescent highlight placements rather than the deepest teal tones for the most flattering blue-eye mermaid result. The contrast between warm pearl and silver highlights and cool blue iris creates a beautiful dimensional effect.
For Green and Hazel Eyes
Green and hazel eyes are particularly beautifully complemented by the mermaid palette — the teal and aqua tones draw out the green and golden flecks in hazel irises and deepen the natural green of green eyes in a way that enhances rather than competes. Navy and deep teal outer corners with lighter seafoam and aqua across the center lid create the richest color-enhancing result for green and hazel eyes. The guide on best lash styles by eye shape covers how eye color and shape interact with different aesthetic approaches — relevant context for anyone wanting to understand how to maximize the mermaid eye’s impact for their specific features.
For All Skin Tones
The mermaid palette is genuinely versatile across skin tones — but the specific shade emphasis shifts to produce the most flattering result. On fair skin, cooler aqua and silver tones produce a delicate, ethereal quality. On medium and olive skin, richer teal and gold-iridescent tones create a more vibrant, sun-kissed mermaid result. On deeper skin tones, saturated cobalt, deep teal, and copper-shift iridescent shadows create a dramatic, stunning mermaid eye with extraordinary visual impact. For all skin tones, the wet finish quality and the inner corner highlight remain the non-negotiable technical elements that define the look.
Making the Mermaid Eye Last in Summer Conditions
Summer heat, humidity, and the inevitable water exposure of the season require specific longevity measures for a look as pigment-intensive as the mermaid eye.
Waterproofing Every Layer
Use a waterproof eye primer as the base, waterproof liner for the lash line and lower smudge, and a waterproof mascara as the final lash coat. The shadow itself — if applied over glitter glue as recommended — will be significantly more resistant to water and humidity than powder shadow applied over a conventional primer, because the glitter glue creates a physical adhesive bond between the pigment and the skin rather than a simply receptive surface. For a complete guide to making eye makeup survive summer conditions, the guide on making eye makeup last all day in heat and humidity covers the full system for summer eye makeup longevity — directly applicable to sustaining the mermaid eye look through a full day or evening in warm conditions.
Setting Spray as a Final Seal
A long-wear setting spray applied over the finished mermaid eye before leaving the house provides a flexible, water-resistant seal over all products and significantly extends how long the look holds its luminous, wet-finish quality. The setting spray also refreshes the shimmer particles in the iridescent shadows — if the look has been applied a few hours before an event, a light mist of setting spray immediately before the event restores the fresh, glass-like quality that defines the mermaid eye at its most stunning.
The Mermaid Eye Is Summer 2026’s Most Magical Look
The mermaid eye trend is having its moment in 2026 for good reason — it is genuinely beautiful, genuinely wearable when executed with the right products and technique, and captures the specific quality of summer light and summer freedom that seasonal beauty looks are supposed to embody. The iridescent, aqua, and pearl palette transforms the eye area into something genuinely extraordinary — and the look photographs with a luminosity and depth that almost no other eye makeup approach can replicate.
For anyone who wants to pair the mermaid eye with an equally stunning lash look — whether natural extensions, a lash lift, or a dramatic layered mascara result — the festival and special-occasion lash guide at the festival season lash survival guide covers exactly how to keep lashes looking impeccable through the extended wear that summer occasions demand. For the most authoritative and visually inspiring editorial coverage of the mermaid eye trend as it has developed across Summer 2026 — including runway references, product picks, and professional technique breakdowns — the Allure guide to the mermaid makeup trend is one of the most comprehensive and regularly updated editorial references available. For expert makeup artist tips on working with iridescent and duochrome pigments to achieve the maximum color shift quality that defines the best mermaid eye looks, the Byrdie guide to iridescent makeup covers the technical and product details that make the difference between a genuinely stunning mermaid eye and a merely colorful one.